How to get into Factorio without overcomplicating things.
I find Factorio is one of those games people tend to stumble blindly into. It's fairly complicated, there's more going on mechanically than it can look, and the developers' policy of never putting the game on sale means new players just sort of trickle in with nobody to compare notes with besides old veterans, and in my experience, nearly all old veterans have been playing so long they have long since gotten bored of goals like, you know, winning a run of the game, and are more interested in building bases that sprawl as vastly as they possibly can before their frame rate drops to an unplayable level. So you're likely to go look for tips or build examples if you ever get overwhelmed, and the stuff they encourage is SUCH ridiculous overkill both in terms of scale and in terms of consuming top-of-the-tech-tree resources that you will likely lose the game if you try and copy the things they do. On a related note, just about anyone you find talking online about "the early game" of Factorio are talking about a period between when the words "you win" appear on screen and maybe 10 or 20 hours past that point. Fortunately, I'm here to teach you the important stuff and hopefully not instill any terrible terrible habits.
Another thing worth noting if you're looking to copy other people's homework is that different people have really different approaches to the game. A LOT of people are on the highly ordered part of the spectrum, and will do stuff like fiddle with the settings to just outright disable a ton of the game's features (no terrain features to work around, no enemies to deal with, no coastlines to run up against, etc.), will pave over the entire world with concrete, worship "the bus," their term for when you just have every resource in the game on its own parallel conveyor belt carrying them all out in a big thick line to the edge of the explored map, and tend to get real obsessive about uniformality, often ending up with bases that look like this.

At the other end of the spectrum, you've got horrible little chaos gremlins building sprawling chaotic masses of spaghetti, slapping stuff together to accomplish short term goals with maximum efficiency, and then as new stuff unlocks and designs need to be adapted, just snaking and squeezing resources all over to where they need to get, resulting in tangled balls of horror it's hard to parse out the purpose of at a glance. Personally I'm a big spaghetti fan. It works better with the default settings of the game or more challenging ones, leaves you a lot more opportunities for creativity, and is generally way more in line with the game's aesthetic.
But the point is if you're looking to swipe designs from someone else, you should poke around and make sure it's someone who has similar priorities to you. I'm trying to write this guide in a style agnostic way though. There's a lot of valid and interestingly different ways to do most things in the game, frankly.
Hey what am I even supposed to be doing here?
So, the premise of Factorio is that you are some weird highly motivated engineer who has crashed on a hostile planet full of abundant natural resources, and also just... Starcraft Zerg pretty much straight up. From there, you have 3 basic simultaneous goals:
- Build a bunch of automated infrastructure to do things in a quick and snappy way.
- Research a bunch of niftier technologies, eventually unlocking the ability to launch a new rocket and win (and maybe also get the last science flavor to grind eternally in the postgame).
- Don't let the zerg kill you or smash all your stuff up.
But before you do any of that, you have to slog through the early game, which is weird and doesn't really work like the rest of it, and really benefits like crazy from knowing a few hotkeys.
So it's WASD movement, T for tech tree, E for inventory, left click to put a thing down or open a thing up, right click to remove something from the map (either things you placed or like, rocks and trees), space to shoot, and while rarely relevant, enter to get in/out of vehicles.
Then you've got some really important hot keys that you don't NEED but wow are they great especially early on. Holding control lets you snag things out of things, holding F lets you vacuum loose items off the floor, and holding Z lets you quickly drop whatever is in your hand into things (or onto the floor). And as a general rule, you can hold buttons down while running around to just keep doing whatever thing where your mouse is. There's even nice quality of life things like if you hold the button to place a conveyor belt, and run around or swing the mouse around, it'll ignore the axis the belt's not traveling in, so you can really quickly drag a big line out, AND automatically place underground belts if your path crosses an obstacle. Hold the button to place a power pole down and run around and you'll keep auto-placing more just far enough apart to stay connected. And of course if you have, as tends to be the case in the early game, a line of furnaces smelting things, you can put a stack of coal in your hand, hold Z and smear your mouse over them all to roughly evenly distribute it everywhere, then hold control and drag all over to get the smelted products out. Speed runs for this game are under 2 hours, and like half of that is in the early game where you're constantly moving stuff around by hand. Would be a lot more if not for those time savers.
While I'm at it, when you're fiddling with inventories, various combinations of left and right clicking, holding shift or control let you do stuff like "get 5 of these, take half this stack, put one thing in my hand here not the whole stack" and then there's like the most important hot key in the game, alt, which you hit exactly once after starting a new game so that all of your machines and furnaces display what they're producing and then never touch alt again except to fix it when you alt-tab out and accidentally turn that display back off.
Getting through the early game quick
So the ship you crashed on- Various stray debris bits can be picked up, and/or opened up, and contain some raw materials and starting stuff that's handy to have, so, clean all that up, and maybe some of the stray trees and large rocks scattered around, because you need some wood early on, and grabbing big rocks gives you some nice quick hits of stone and coal in addition to a more open canvas.
Basically the first thing you want to do is grab some stone, grab some coal, and grab some iron (right clicking big yellowish black and bluish splotches on the ground), then go into your inventory and convert those to a bunch of furnaces, and a bunch of miners. The miners will continue to grab stone coal and iron for you, and also copper, and the furnaces will melt the iron and copper from raw ore into plates. Ideally you want to throw down a row of I dunno like 6-8 miners which feed with their little arrows directly into a line of furnaces next to them, so all you have to do is take some coal now again and sloppily throw it all into all the miners and furnaces, then swing by when you have a space moment, and control drag over all the furnaces to get decent sized stacks of useful stuff out.
Furnaces can also cook stone into bricks, and putting iron plates back into furnaces turns them into steel, but you don't need to do either of those early on, so for stone, it's nice to slap down a wooden box in the middle of a stone patch and make a cute little flower of 4 miners feeding into it. Meanwhile the little trick everyone does for their early game coal mining is you put a miner down on the coal whose output feeds directly into another coal miner, which either feeds back into the first one, or into a little conga line of like 4-10 coal miners that all feed eachother in a loop.
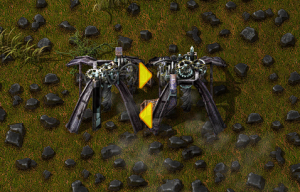
Machines and furnaces in Factorio all tend to have decent sized personal inventories, so particularly when things get backstuffed, you can raid stuff out of whatever's producing it and/or what it's getting shoved into. And anything which needs coal to fuel it like these early game burner miners have a big fuel slot, AND generally speaking if something isn't able to do a thing it just shuts off to conserve power/fuel (but there are some things that constantly suck up SOME electricity even when idle). So left alone, this sort of loop will eventually leave them all with 50 coal each in the fuel slot. You can come control-click raid that out and they'll automatically fill eachother back up.
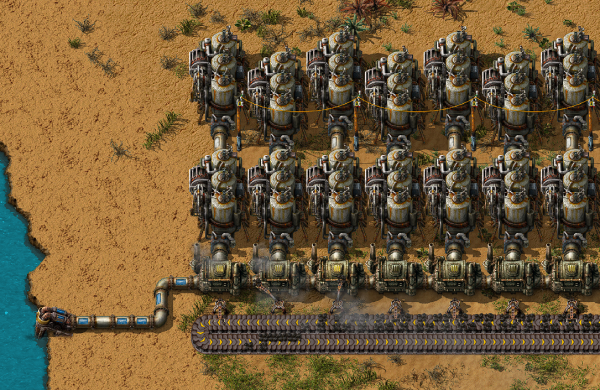
So once all that's sorted out, you can then set up the stuff you need to escape the early game: By the edge of some water that's ideally close to some coal, you want to plop down a water pump, attach a boiler, stick 2 steam engines on it, put a power pole in range of those, and then another in range of a science lab you're plopping down. Make 10 red science vials in your inventory, dump those in there, get the first tech on the tree, and then move on to actually starting to play the real game. Oh and while you're setting your steam engines up, you should probably make space for a proper steam power setup going forward. There used to be throughput concerns with early steam setups and you may find out of date info on that, but all you really need to know is: You put a pump on the water's edge, you use pipes to pipe water from that into or through boilers (which you can daisy chain together), and each boiler can support two steam engines off the side (which you can also chain. You also need to put coal (or some other fuel) in the boilers, so you probably want to run a conveyor belt out one space away from the side without the boilers and set up inserters later to move coal in. You also need to have a power pole in range of every steam engine, and have all those poles connecting to eachother and extended out to cover everything that needs power. Which is most things. So basically everyone builds out in some variation of this pattern.
And tada, that's power solved for... the entire game really. There's two other power sources that eventually become available. Solar, which is pretty simple, you just put a solar panel down wherever, have a power pole in range of it that's attached to the rest of your power lines, and you want to add accumulators where you can so there's batteries to keep things running at night. And it's let's see... 25 boilers vs. 80 solar panels for the same output, with the steam setup being cheaper to make, and letting your character pass between the machines slightly better than the not-at-all you get out of solar. Solar on the other hand doesn't need access to any resources, so you can fill in blank areas of the map with it, and doesn't create any pollution, which also means horrible bug monsters won't flip out about it. Later there's also nuclear, but it's so expensive to set up and such a late unlock it is, it's faster to just win the game than to get a single nuclear setup going. Totally worth it if you're playing on after winning, but in the most practical sense, steam now, steam forever is the best bet.
Now it's time to learn about belts and inserters!
Doing convoluted things with conveyor belts and wacky inserter arms is kind of the bulk of what you do in Factorio, and there's some really important mechanics to them that really aren't obvious, so this is kind of why I'm even writing this guide. We'll start with our wacky friend, the nobel inserter.
Inserters are your best friend. Remember when you're placing them, they have two legs behind them, and one leg out front. If they have power, they will grab things from the tile behind them, whether that's a belt, a machine, a loose item on the ground, or a crate, and plop them down on the tile in front of them, again, whatever's there (unless there's no room, or it's a machine that doesn't have a use for what it would be grabbing). If you want to be a total weirdo, you can fully automate a whole factory with nothing at all but inserters, just bucket-brigade passing everything around in long chains, but they do use power and belts exist so maybe don't. Generally speaking, you set things up so you have a row of machines, a row of inserters and power lines, and a belt, which they're either using to get stuff into the machne, or out and on its way to somewhere else. You can also use them to just directly take things out of machine A and put them in machine B. They're also pretty smart all things considered. If you have a machine which turns iron plates into gears, and for some reason you have an inserter pulling from a belt that contains a mix of iron and copper plates, it will not try to grab the copper plates, and will just let them go by. If you have a mixed belt of iron ore and coal and they're facing a furnace though, they'll grab an even ratio of each. Machine or crate they're feeding not need more? They'll wait until they're needed. You can even stick inserters between two science facilities and snag research vials from one and give them to the other if the one they're feeding into is in need, which can make some setups easier.
It's worth noting though that their little animation isn't for show. If items are going by on a belt faster than an inserter can move, it will be unable to grab things off the belt. They just feebly reach out and barely miss. It's kind of cute. This comes up both with standard inserters and very fast belts, or even with standard belts if you aren't producing enough power and machines are starting to slow down. Technically you have access to inserters before you have electricity, but burner inserters are extra slow, and periodically need coal added to them. They do have a quality of life feature that if they're moving coal, they'll just steal some as needed, so they aren't bad for feeding boilers, but if the belt ever runs dry for any reason, they miss their self-refueling, and once you solve everything else you need to run around and hand-feed every one some coal to get them going again, which is a pain. Regular inserters feeding boilers will also grind to a halt when the power goes out, but don't need to be manually babysat to get it back on. Oh and red inserters skip over one tile both in front of and behind them, but any tile of a machine is as good as any other, so, machine, red and not red inserters, belt, belt is handy for getting multiple things into one assembler/science lab/etc.
Then we have belts. Belts are pretty simple. There's a belt tile, it points in a direction. Whatever ends up on the tile gets pushed off to that direction if there's room for it, or sits and waits patiently until there is. This mostly applies to loose items being moved with inserters or dropped with Z, but they'll also move you, or a vehicle, whatever. They don't care. Also, they don't require electricity at all. And they come in 3 flavors, with red going twice the speed of yellow, and blue 3 times the speed of yellow. But now for the big grand glorious secret of success in Factorio- Understanding that every belt is secretly actually 2 belts.
While not particularly clear from the visuals, seriously, when you see a conveyor belt, you should always imagine you are seeing two belts side by side. If one side of a belt is full, things that would otherwise be added to that side will patiently wait, and leave the other side empty. If for any reason one side of a line backs up and everything on it stops, things will keep moving along the other lane. You can put turns in a belt just fine, but if you have a T intersection, we don't get the nice curved belt graphic, and everything gets shoved to just one side of the belt. This is actually super useful for when you want to have two ingredients both going to the same machine just ridng along together, or making sure to use both side fully when bringing just all the ore ever from a big mining setup to some furnaces, and a horrible nightmare you have to clean up by hand if done accidentally, like in this example which would still work like this without the splitters.
The rules of thumb to remember are that miners, both the early game burner ones you want to stop using ASAP and the superior electric ones, push things out, so if you pplop one on the west side of a north-south running belt, everything ends up on the west side (no inserter needed). Inserters meanwhile can grab from either side of a belt as needed, but will only ever place things on the far side of a belt from them. So again, inserter to the west of a belt, everything ends up on the east side. Inserting in the same way a belt is moving is technically consistent about where it drops, but if you rotate or mirror a design it can end up on the wrong side and really muck things up, so try to avoid those setups if there's any chance it'll matter.
All of this matters a lot when you start getting late game recipes where 3 or more things go in and belts need to start pulling double duty. Especially science, where you eventually need every lab to have every flavor of science coming in at once. Also good to remember, as you upgrade to those electric drills: While burner drills both occupy and mine a 2x2 area, electric drills are 3x3 structures that mine out a 5x5 space. Good for covering weird corners/not leaving resources unmined because the belts and power lines have to go somewhere, but much easier if you aren't paying attention to those "expected yield" popups to get the odd bit of copper in your iron line or something and have it make something stop working until you go pull it out.
Not dying
So I mentioned the planet your on has both lots of resources and lots of zerg, right? At some point, those are going to be A Problem. Any part of your base that is consuming or producing stuff (so assembly machines, steam engines, drills, chemical plants, but not belts, inserters, pipes, or power lines) generates pollution when active. Some pollution gets absorbed by the ground, the water (turning it a deep sickly green), and especially the trees (which can soak up a lot, to the point where keeping big polluters in forests can be a real game changer). Eventually though it'll spread out in a big cloud that will almost certainly touch those pulsating bug nests all over the map. This ticks them off, and they will proceed to form up little murder squads and head towards the source. Along the way they'll attack anything that could attacks them back (including you, but prioritizing stuff that's actively attacking), anything that causes pollution, anything keeping them from moving the way they want to move (including the odd rock or tree), and rarely, other stuff they see. They also periodically form little parties to go turn into new nests, and will eventually fill the map in, so, one of those is going to get angry.
They are totally in the right in doing this as you are plainly making their home unlivable, but... you're honestly playing the villain in this game, so the best way to deal with this is kill them by the thousands, letting their bodies pile against your walls. Just try not to look at them, it's kind of depressing. There's a few things that help out defensively, and you generally want to scale up through these options as the game progresses:
- Run over with a loaded gun (or pickaxe in a REAL pinch) and shoot at them. This can work as a last ditch desperation thing, but you should move on from this terribly innefficient and risky option ASAP.
- Place clumps of 2-4 gun turrets neat hot spots, and come back to load them now and then. Hot spots include around the perimeter of your mining area, around your power production area, around your labs, and anywhere you get an alert that you're under attack or where you see the pollution cloud on the map is licking a nest cluster.
- Upgrade that weaponry. There's techs that make your bullets better and your guns fire faster. These effect turrets more than your personal stuff, which is why you stop using your personal stuff. There's also armor piercing rounds, which are a bit costlier to produce but worth it once they start showing up with armor in need of piercing.
- Kill them first. You generally want to avoid going out with a bunch of heavy munitions and destroying nests left and right, because there's an evolution value that climbs up very very slowly over time as they absorb pollution, and very very quickly as you destroy nests (bugs themselves are fine). This permanently upgrades the size of the waves of bugs they send at you, and the size of the bugs in those waves. Bigger ones are much tougher, spit more potent acid farther, and can just reach over the side of your walls for melee attacks. Generally speaking though there's going to be some at the start of the game that are just too close for comfort, and it's worth the spike to not just be constantly fighting. It's especially good to do this as part of the next escalation.
- Wall yourself in. Using either actual walls, or pipes in a pinch, box in a big chunk of territory with your entire base and any resource patches you think you might need to expand to (you generally need to claim some oil, and about 2 big patches of iron copper and coal beyond your starting area, plus maybe one for stone). Place gun turrets all along the edges eventually, at first just where attacks seem likely, kill everything inside the box, and do a few sweeps to make sure they didn't set up expansions behind you as you do so.
Add flame turrets. Line every wall (from a bit back, they do have a minimum range). Turret connected to max length underground pipe connected to turret is usually a good distance. Then put more in the gaps if you really really need them. Make sure corners have extra coverage. Flame throwers do absurd damage, require no power, and consume shockingly little oil. They're the best.
If you don't just win before it's relevant, extending a grid of roboports out to your wall, and feeding a truckload of construction robots and repair packs into the system mostly ends maintenance. You still want some guns backing up the flames, probably, so you may want to run a giant belt around to feed ammo to them constantly, or massively upgrade power and switch from guns to lasers.
The enemy pathfinding is really interesting. They will try different routes if they keep dying in one place or just because they can, and have pretty good priorities, but since they prefer not having to smash a bunch of stuff just to approach, you can funnel them a bit using extra walls to build little corridors, "dragon teeth" or even little mazes to funnel them into more optimal paths for the flames to really do their job.
Because that evolution level and the number of sides you need to deal with attacks from rise faster the more your pollution spreads, and your pollution spreads faster the more you're producing, there's an interesting self-balancing difficulty. Expand faster, get attacked earlier and harder. It's worth being picky about map seeds when you're first learning the game to make sure you won't stretch yourself too thin grabbing distant resources, have bodies of water you can use as natural barriers, and honestly most importantly, avoid starting in lightly forested/outright desert areas if you don't have a handle on this stuff, but if you win the arms race, you do eventually hit a point of being functonally invincible.
Playing through the bulk of the game, otherwise
Once you have electricity up and running, and access to assembly machines, there's sort of an awkward transitional phase where you're still moving stuff around by hand, but generally, you want to set up some big mining setups feeding into big smelting lines (common for people to do mirrored setups where the inside or outside belt(s) have a belt with ore on one side and coal on the other, inserted to rows of furnaces, whose output combines to one nice overstuffed belt), get big outgoing belts of iron and copper, and then set up assembly lines that grab those off to make stockpiles of things you need a lot, and into areas that do whatever necessary sub-steps and eventually spit out some flavor of science to take to your labs.
Now here, a lot of people get hung up on perfect golden ratios and evenly filled belts with no gaps flowing all over, and way too many people have this downright religious obsession with building a "central bus" where they have like 20 parallel belts running out to infinity with the rest of their base diverting resources off them and using a series of splitters to rebalance all the lanes after and make it all pretty again and... yeah there's actually no practical benfit at all to doing that, it's kind of resource intensive, and tends to conflict with the geography randomly generated maps hand you. That said, there are a couple ratios it's good to know offhand. There's a sweet spot where accumulators match the output of solar panels during the night (21 accumulators per 25 panels), but erring closer to 1:1 gives you a nice buffer for usage spikes. The throughput of a yellow belt is 15 items a second on each side. Most stuff gets produced at 1 a second, so like, run a belt through an ore patch, put 15 miners on each side, that's a full belt of ore. Run it to some furnaces, have 15 inserters on each side yanking stuff off to feed furnaces (or 30 along one-side, they PLACE on the far side but can take from either and all... and OK starting furnaces take 2 seconds to do stuff, so you need the better ones, or twice as many to evenly drain it all). The plates that come from those collectively fill a belt, etc. And the golden science ratio is handy. 5 red, 6 green, 5 grey, 12 blue, 7 purple, 7 yellow. That's the ratio of constantly operating assembly machines you need to get every science flavor in equal quantities, and generally speaking as you move up the tech tree, everything wants everything you can make (but a lot of things don't actually need grey, and there's a ton that needs either yellow or purple but not both, so you can underbuild those and alternate).
If you need oh, advanced circuits, and you have a setup that's making at least some, cool. If the thing you need those for needs more than you're producing, go check if the assemblers from those are short on something and add more, or if they aren't, add more assemblers for the advanced circuits, then check if you're overconsuming something now. Do you need more iron? You probably need more iron. Miners eventually dig everything near them up and need to be moved. Maybe you have a big awful sprawl of ad hoc splitters pulling everything from your one smelting array without a care for ratios of consumption (which, I want to stress, is fine to do). If one side of a splitter gets backed up, everything just flows out the other side, ratio doesn't matter, although balancing sides of the belt could). You might need to feed another smelting line into it if it's looking thin. Maybe upgrade to faster belts up through the most significant split. Or just have an unconnected iron artery running from some other source to where it's needed, whatever. If it all works it's fine. Don't worry about how chaotic it looks. Do maybe space major things out enough that you can sneak more belts across the map later, and remember when you hit the point that you need a bunch of undergrounds to cross the belt tangle, the standard ones only skip 4 tiles (red skip 6, blue skip 8). Oh and you need more steel. Go set up a big mining/smelting section just to have an extra steel line to put somewhere later. Maybe load some into a wooden chest so you can fill up and build pricier stuff at will. Also gears. And you need WAY more copper than that. I know, but later you need just tons.
Getting fancy with oil and trains
Trains in Factorio are really neat. You lay down a bunch of tracks on a larger-scale grid, and make networks between stations. Then you can put trains on those, telling them to say, go to Pickup Stop, stay there until your cargo is full, go to dropoff spot, stay there until you're empty. Just set something up to feed fuel in when it's stopped, they'll haul massive shipments everywhere. The question is, do you need that? Because again, they're costly to build. You could just string like 500 tiles worth of belt across the map. Could be cheaper than all that train infrastructure. If you do build trains though, first build rails, with long flat stretches where you want stations, then the stations, then an engine at the station, then cargo cars, then inserters, making sure it all works when the train's stopped at the station.
While trains are optional, at around the same time they become available, you also start needing to deal with various fluids, mainly oil. At first, oil is pretty simple. Find an oil field (purple dots on your map, little black puddles probably hidden by trees in the normal view). Build an oil derrick on each of them. Run power lines out to them (big poles help a lot), run pipes between all their outputs, and (probably using just so many underground pipes, because you can't walk over normal pipes) get that oil where it needs to be. Periodically you might need to put a pump down (remember you can't hand-craft engines), and get power to it, but basically, you just take it to an oil refinery (or several). Oil goes in one side, petroleum out the other. Pipe that where it needs to go.
There's a blue technology called advanced oil processing you want basically immediately, which lets you switch to an alternate recipe that gives you way more petroleum, but makes getting it a bigger headache. Once you switch (you have to manually change it on each refinery), you bring in a second pipe with water (don't ever let pipes with different fluids touch unless at least one of them is an underground pipe tile). You now get even more petroleum, plus two annoying byproducts, light and heavy oil.
Heavy oil can get sent to a chemical plant to make lubricant, yet another liquid you need to make all the fanciest, blue-est products at the end of the tech tree, or you can feed it into another refinery with more water to turn it into light oil. Light oil can be used to make rocket fuel, which you obviously need to launch rockets and win the game, but it also makes other vehicles go faster, and you can put it through yet another refinery for even more petroleum. Either flavor of oil can also make solid fuel, which is like triple-strength coal, and the only other ingredient in rocket fuel.
Aside from all the headache of piping 6 different fluids around (7 if you're making and storing acid in the same area) without touching other pipes, the real catch to all this is that if any of the outputs of a refinery backstuffs, the refinery shuts down completely and won't produce the others until you get the one it's full on out somehow. The classy fix for this is to learn how to set up circuit conditions to, say, turn pumps on and off to cycle fluids back around for more petroleum (the one you really really need) if they get too full. Or, you can just work out a ratio to do that in that works for you and still lets you stockpile oil for making fuel and lube. OR, you can just build so very many fluid tanks and just bank up enough of everything to win before it becomes an issue (something like 24 petroleum, 8 light, 4 lube should do it).
You can also use fluid wagons or barrels to move fluids around, but you shouldn't have to. Just make 1000 underground pipes and don't clump everything up to a point where it's too hard to run them where they need to get.
Bots and blueprints
Near the end of the game, you can make roboports, either to place on the floor, networking with eachother and covering a big area, or as a personal backpack to shove into the extra equipment slots of the higher end armor types, along with personal sized solar panels and batteries. You can then create two flavors of robots to load these up with. The first, and harder to live without of the two are construction robots. They will grab what items they need out of special provider chests you set up within reach of the roboport network, or stuff in your inventory if you just have the bots in your pocket, and fly out to place things down if you have a ghost version of them in place, or something has been destroyed. They will also grab repair packs and go fix things. They'll also pick stuff up that you mark to delete, bringing them to you or their networked chests. Especially when you really know what you're doing and have blueprints ready to go, or you're using the copy and paste functions to move something or oh, double the size of your furnace stacks, it is just absurd how easy everything in the game becomes once you start outsourcing work to robots.
The other type is logistics robots. These don't build repair or deconstruct anything. All they do is move stuff around between networked chests, or your personal inventory. They are however, really good at it. You can set your network slots to, say, demand you have at least 500 belts and 100 faster inserters at all times, and as soon as you set foot in your network coverage zone, hundreds of robots will come swarming in to fill your pockets and keep you topped off as you go. I do like using them for that. A lot of people really use them as a crutch though, switching over to a "bot mall" setup late in the game. For every item, they make a machine to produce it, a chest and inserter to request the ingredients, and another to output it to the network. That's what this setup was.
It's a one-sized solution to every problem in the game. All you have to do is set up an assembler or two to build the thousands of logistics bots it needs, and you can completely do away with belts, trains, having to think about ratios or production chains, and just watch little metal bees flit all over. It is nice to have the option late in the game if you built yourself into a corner and just can't sneak another belt around, but to me, it's always felt like a game-breaking cheat code. Still, it's nice to know it's an option.
Upgrades and Modules and Beacons Oh My!
A lot of things in Factorio can be upgraded into better versions of themselves twice, and it's a shame they didn't properly keep the color coding consistent for it. The first of these upgrades is pretty handy. Double speed belts let you feed twice as many machines in the same tileable setup. Fast inserters don't fail to grab things off faster belts, and make dealing with high yield/high demand things like gears and copper wire easier. Assembly machines mark 2 run twice as fast, which is cool if you're tight on space, and also for things like gears where an assembly builds needs a lot of them made before anything else can happen. There's never really a "time to upgrade everything" though. I mean, maybe there is for assembly mark 2s. And after a point standard inserters only really make sense for stuff with longer processing times. Steel furnaces move things along twice as fast AND they're more fuel efficient, which is great when you need a bunch of steel... like you do to upgrade to them. Meanwhile the highest tier upgrades don't give as much bang for their buck, and are mostly upgrades to how many module slots you have. Modules tweak the math on how many resources you're using, how fast you're going, or how much you're polluting, and either go directly in machines, or into beacons that spread their effects over a reasonably large area. Modules also suck up a ton of electricity, take a while to make, and require so very many circuits, mainly red ones, which you'll notice are a bit of a pain to amass. They are worth the effort in the late game, but it's a lot of effort.
Todo
You should know know everything you need to get through the game with just a little personal creativity. If you really stall out and just want to steal blueprints, I've been noodling with these designs. Don't ask how they work just paste them in and plug in the parts. And of course, Factoro has an expansion, which is a huge huge set of daunting challenges even for people who've played the base game to death. So, expect a guide to cover that.