I like cooking, but very rarely have company, and my kitchen is pretty cramped, so usually I stick to one-pot dishes (maybe two if I need rice on the side) that I can eat all at once, or over a couple days. When I do cook for other people, I go for a BIG one pot meal, and by far everyone's favorite is my personal take on chili. It's very mild, heat-wise. It's a vegan as you want it to be, not really too costly or timely to make aside from initially populating a spice rack, so, let me walk you through it. All images available in higher resolution if you open them in new tabs, brands of all products just what I happened to have on hand tonight, no sponsorships or endorsements.
To make chili the way I do you're going to need...
- A stove, or some other means of heating things consistently.
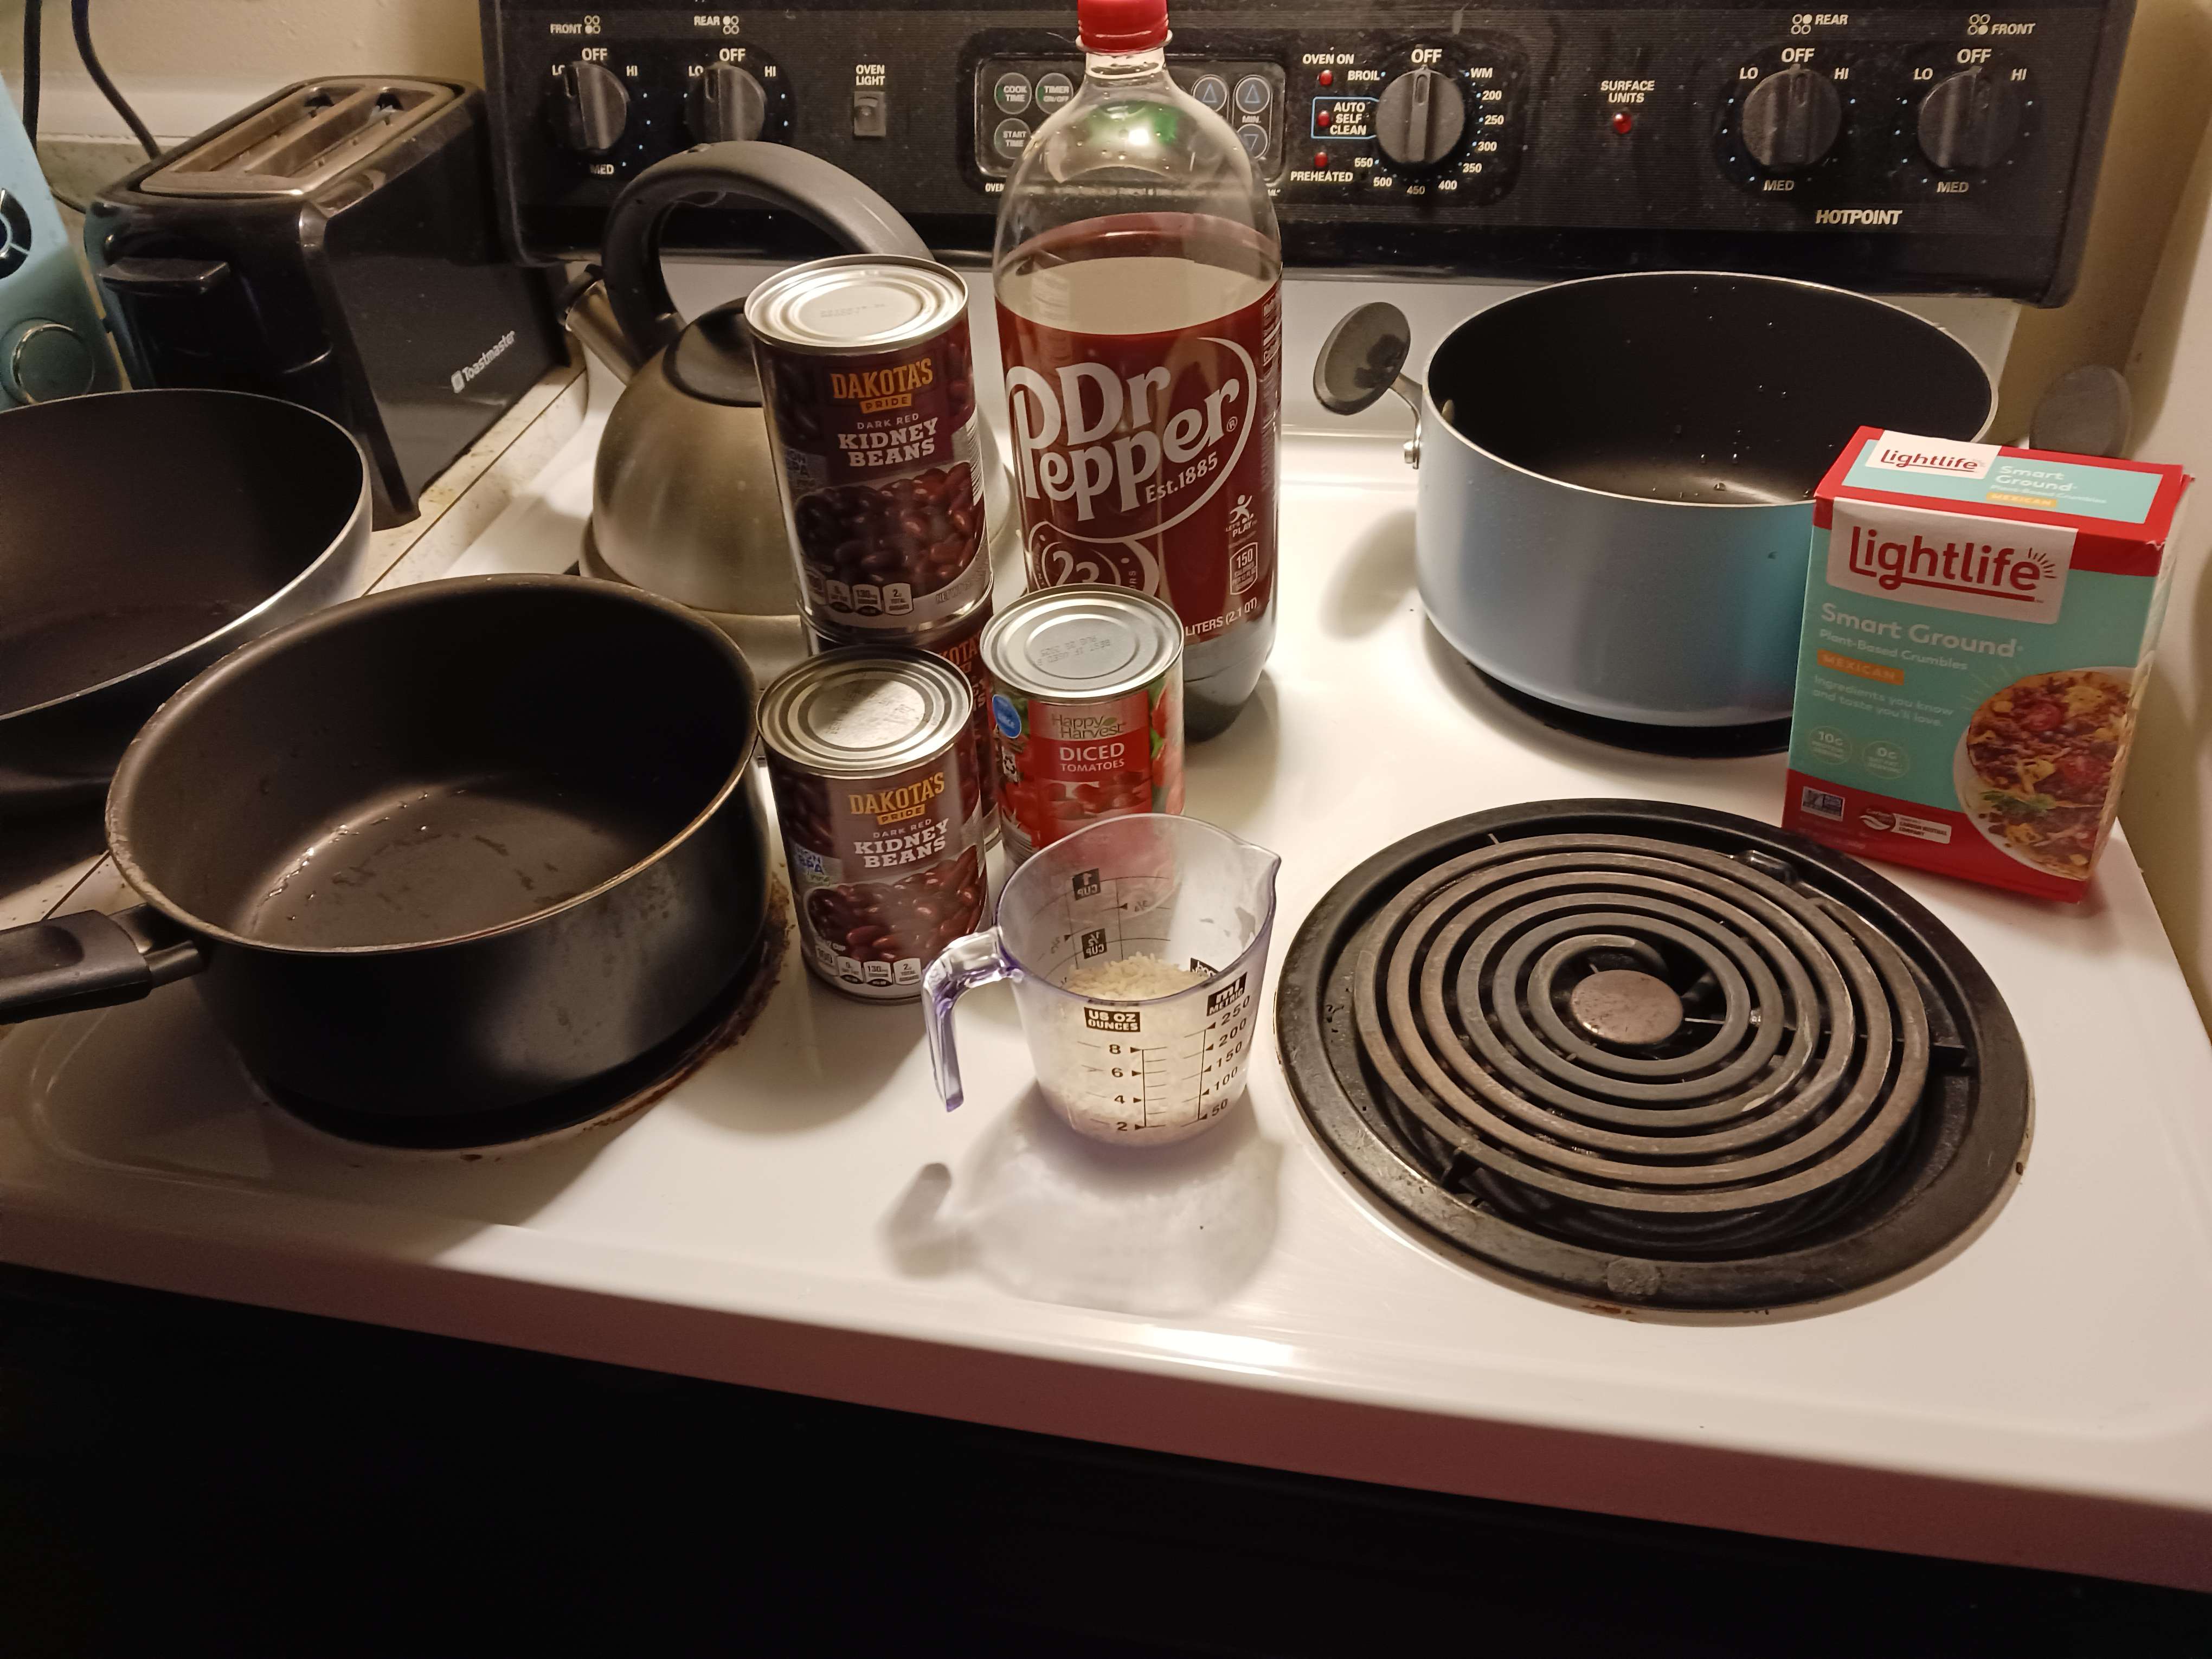
- A big ol' pot (2 liter soda bottle here for scale).
- A big ladel or serving spoon, ideally plastic.
- A bowl (per person).
- A fork or spoon (per person).
- Means of storing leftover chili (generally a fridge, and some tupperware/spare bowls with plastic wrap).
- A can opener (unless using exclusively pull-tab cans).
- A measuring cup (only really needed if making rice simultaneously or you can't eyeball a cup of V8).
- A 20 minute timer of some sort, if making rice.
- Canned dark red kidney beans (I usually go with two or three 15.5 oz cans like this, erring on the high side).
- One can of diced tomatoes (plain, "Mexican style," doesn't matter, usually a 14.5 oz can, aim for 3:1 beans/tomatoes).
- Either a third of a pound or so of ground beef, or one of these vegan crumbles. I actually prefer the crumble for this.
- Roughly 1 cup of V8 (use a measuring cup, a 12 ouce can, or two 8 ounce cans).
- 1 beef boullion cube.
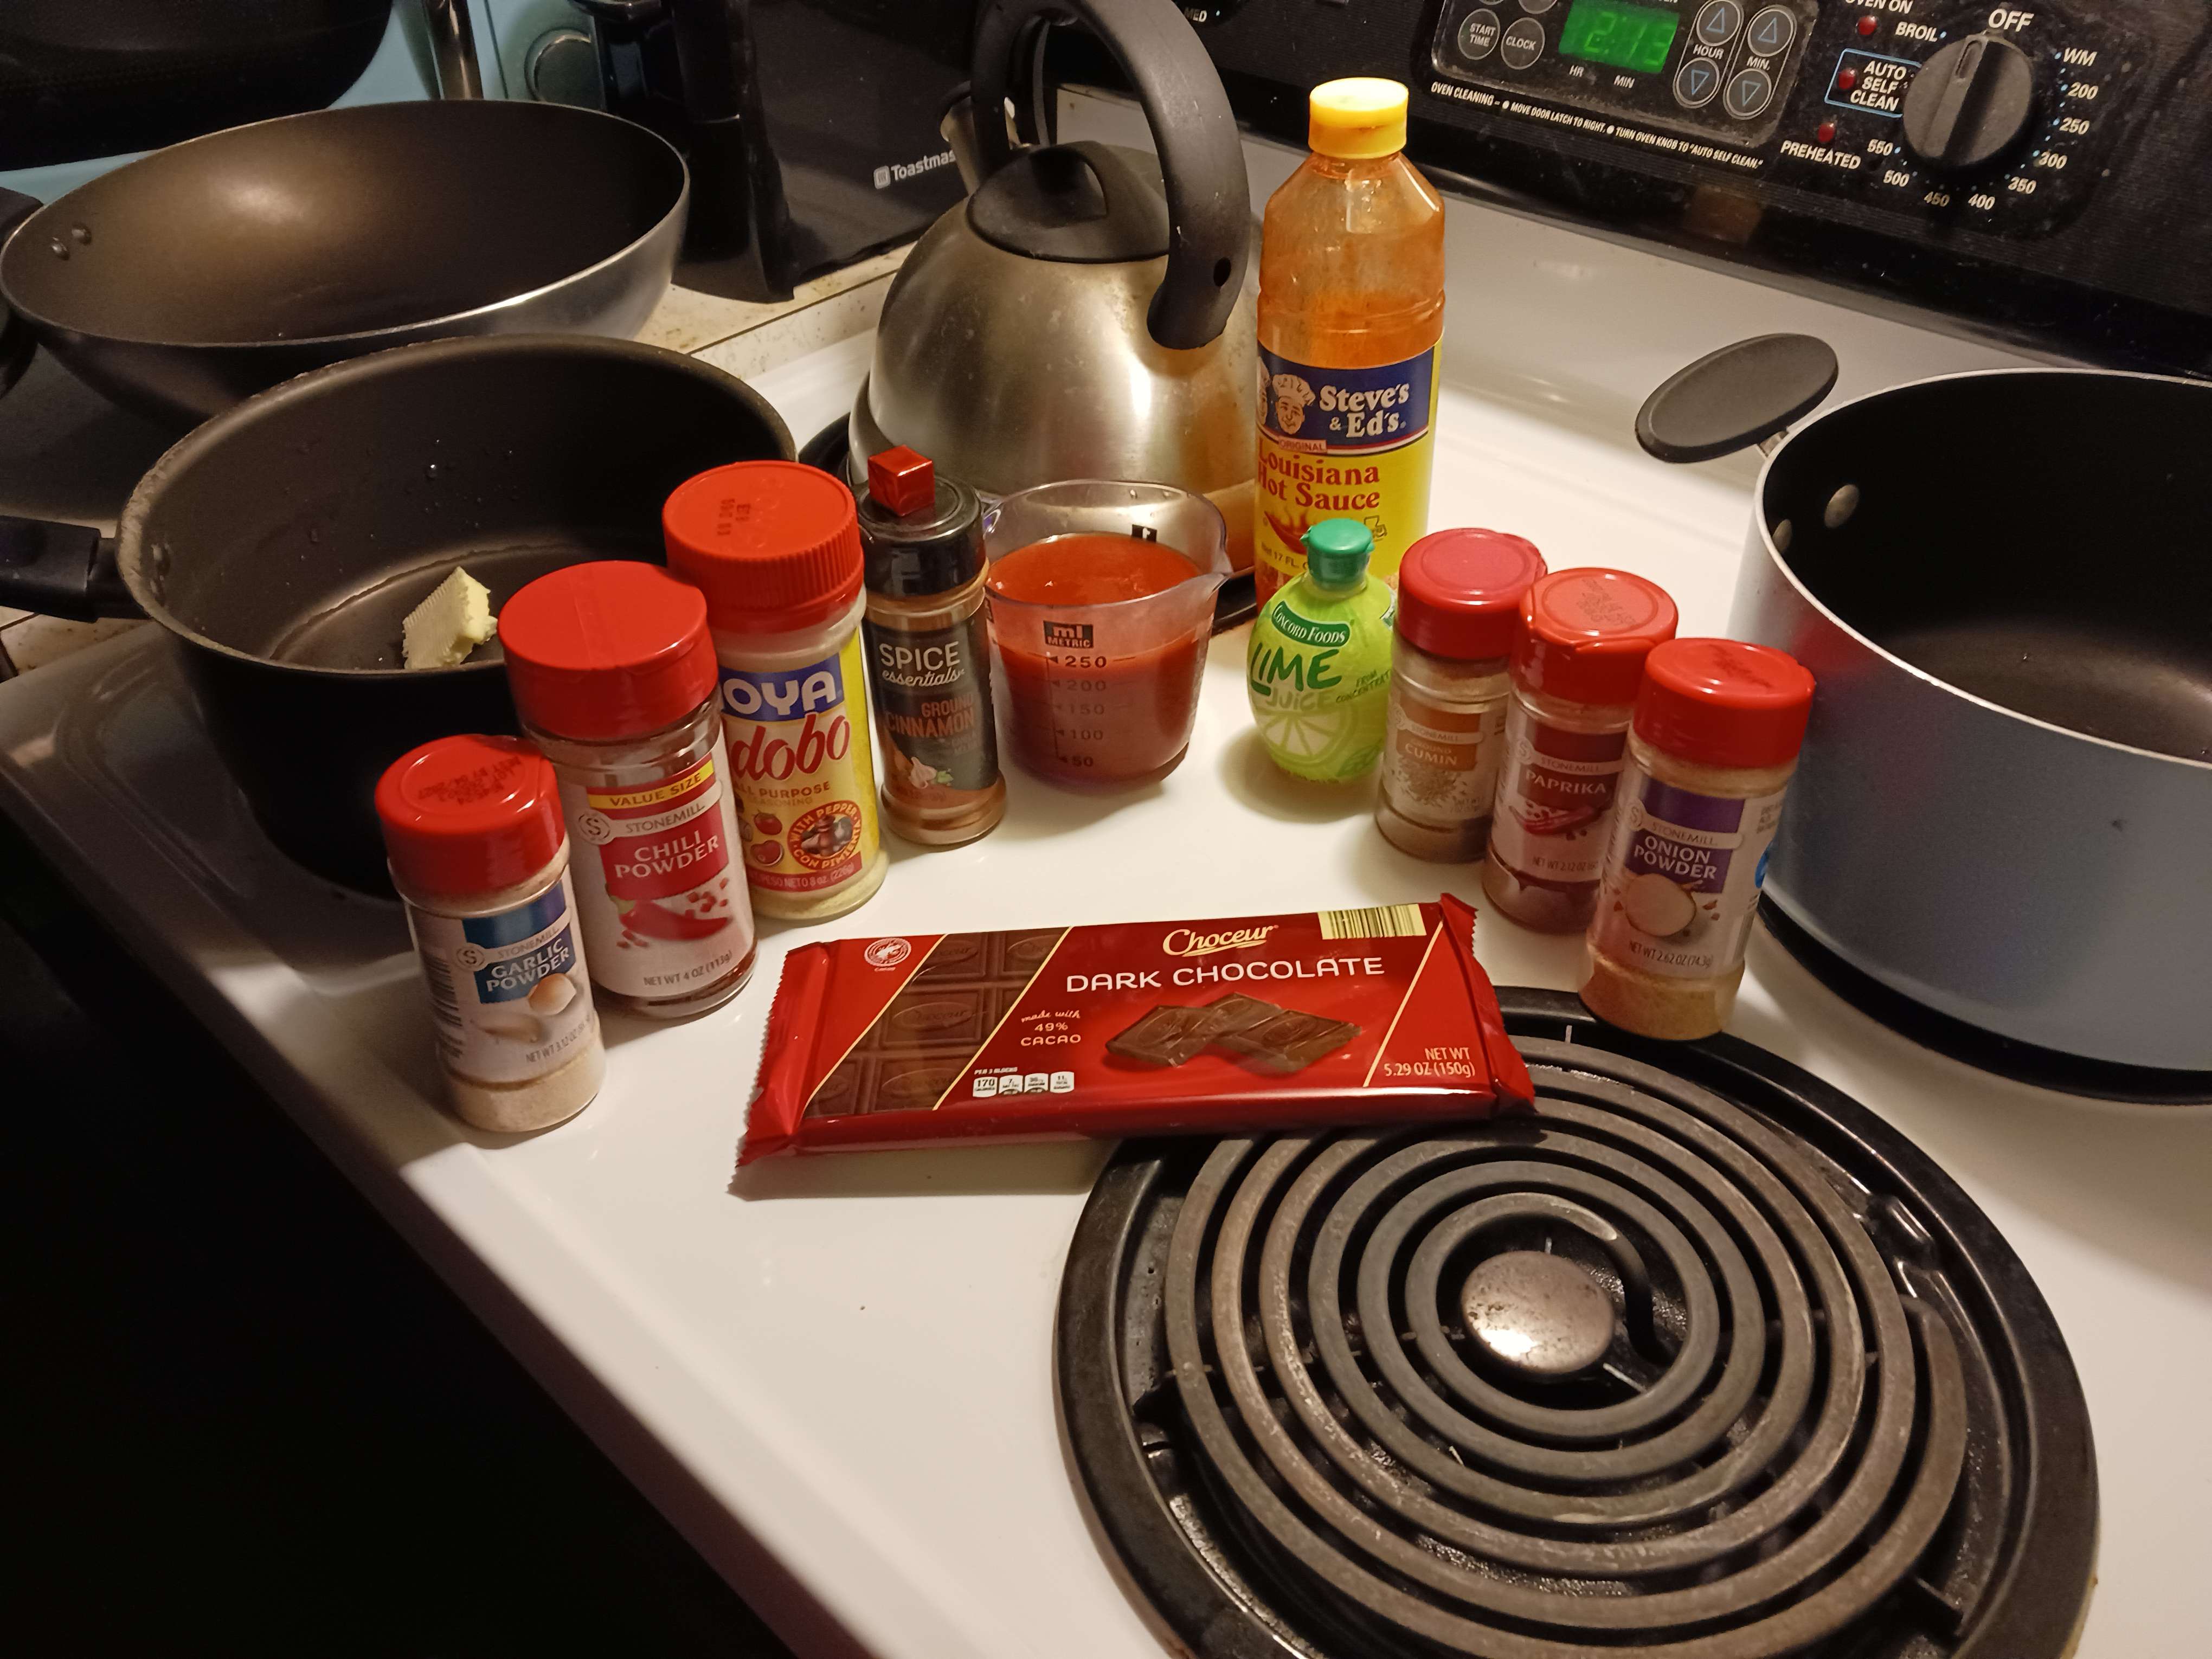
- Around 3 ounces of 60% cacao dark chocolate (I'm using half the bar shown here, but feel free to throw a whole one in).
- Lime juice (I keep one of these from-concentrate squeeze-limes on hand, if you have a fresh one, go nuts).
- Hot sauce (I use a pretty mild brand and not a lot of it).
- And stocking that spice rack...
- Chili powder (obviously)
- Adobo.
- Paprika (ideally smoked).
- Garlic powder.
- Onion powder.
- Cinnamon.
- Cumin (optional).
- Oregano (optional, not shown).
- MSG (aka "Accent," optional, not shown).
- If also making rice: A bag of rice, a sauce pan with lid, water, table salt (or more adobo), butter or a substitute, a knife.
|
  |
Contrary to cooking shows and recipe books, I would not suggest getting all the ingredients out and covering a counter with them, and most certainly not doing what I am for these photos and putting anything on your stove not in a pan. I keep my spices on a lazy Susan in a cupboard above my stove, in the order I throw them in here, cans in the next cupboard over, everything else in the fridge. It's good to take inventory before you start, but I try to keep a small countertop footprint. All you really need out for the whole process is a bowl, the cans, and maybe the chocolate.
First, assuming you're making some, and don't have a rice cooker, you want to carefully measure out some quantity of rice, pour it all into a bowl, dry.
Measure out twice as much water as you have rice, pour that into a saucepan.
Cup your hand (which should be both clean and dry), pour a small amount of salt into your palm, and throw that into the water.
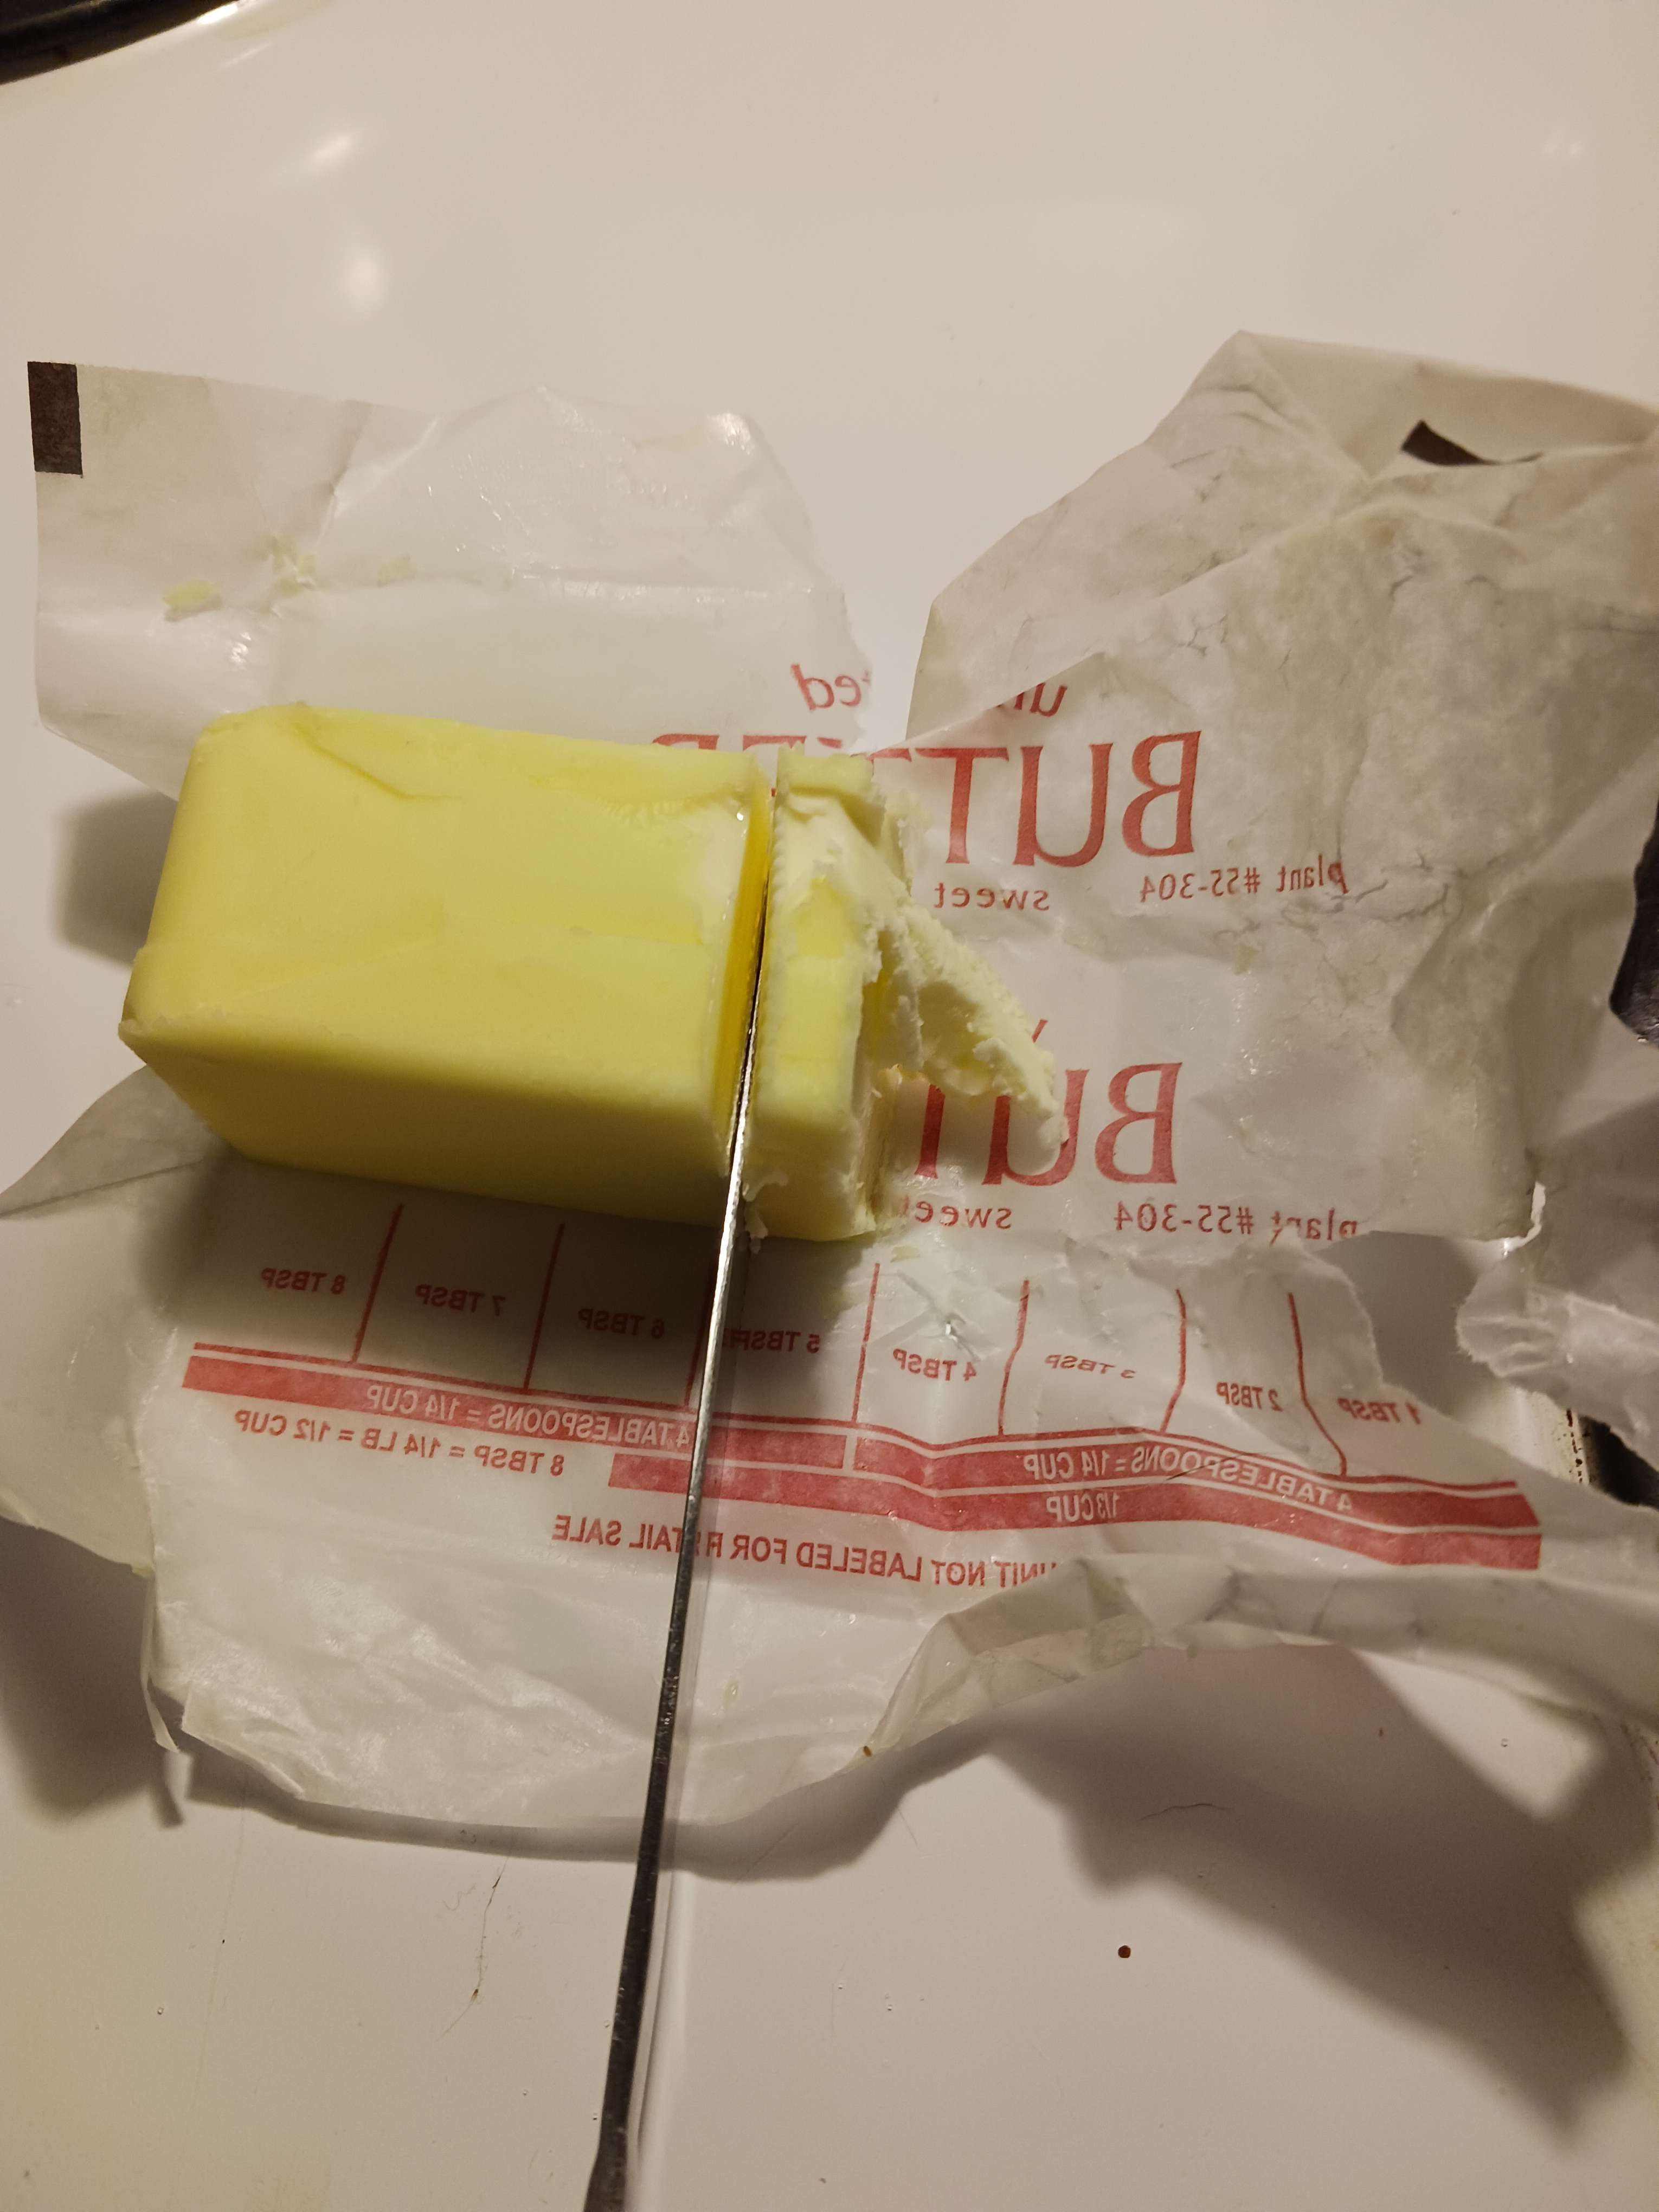
Cut/scoop a small pad of butter and also throw that into the water.
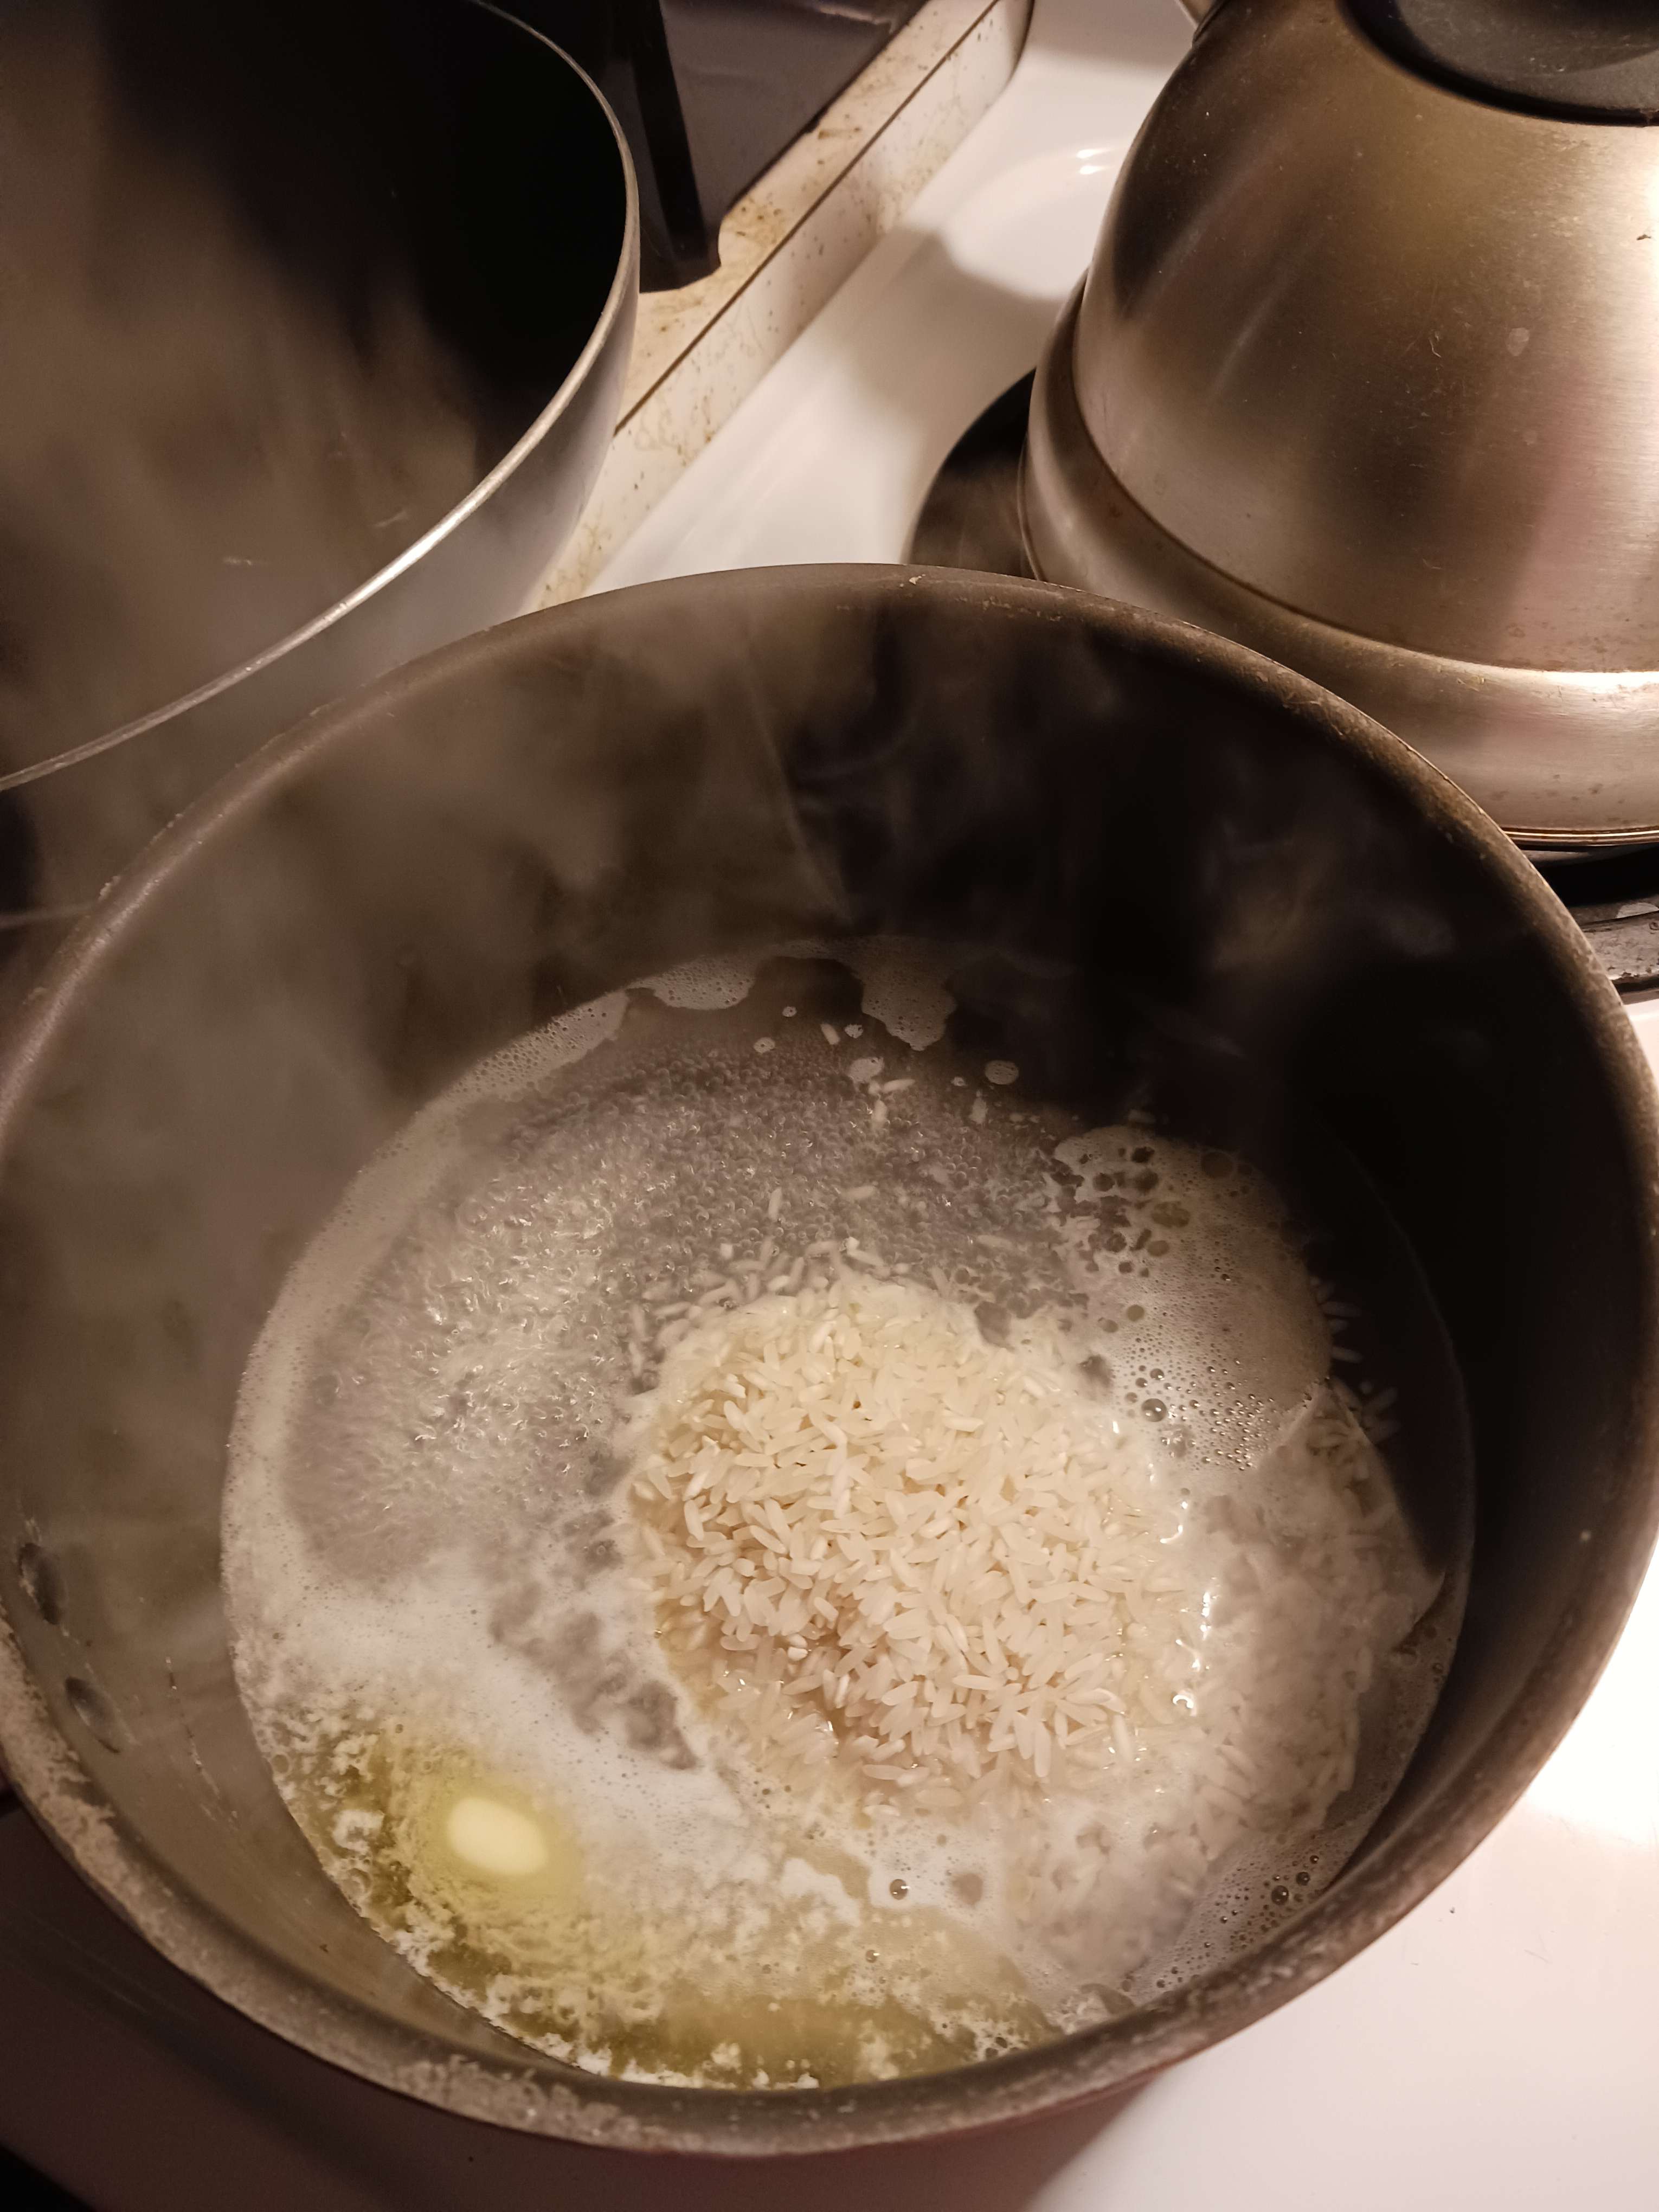
Keep an eye on the water for it to start to seriously boil (not just a couple bubbles, rapid movement. Once that happens, dump in the rice, and spread it out evenly, either giving the pan a shake or spreading it with whatever utensil is handy. Lid goes on the pot, temperature setting drops to 2, timer gets set for 20 minutes. Rice cookers are popular because these steps are fairly exact otherwise.
|
   |
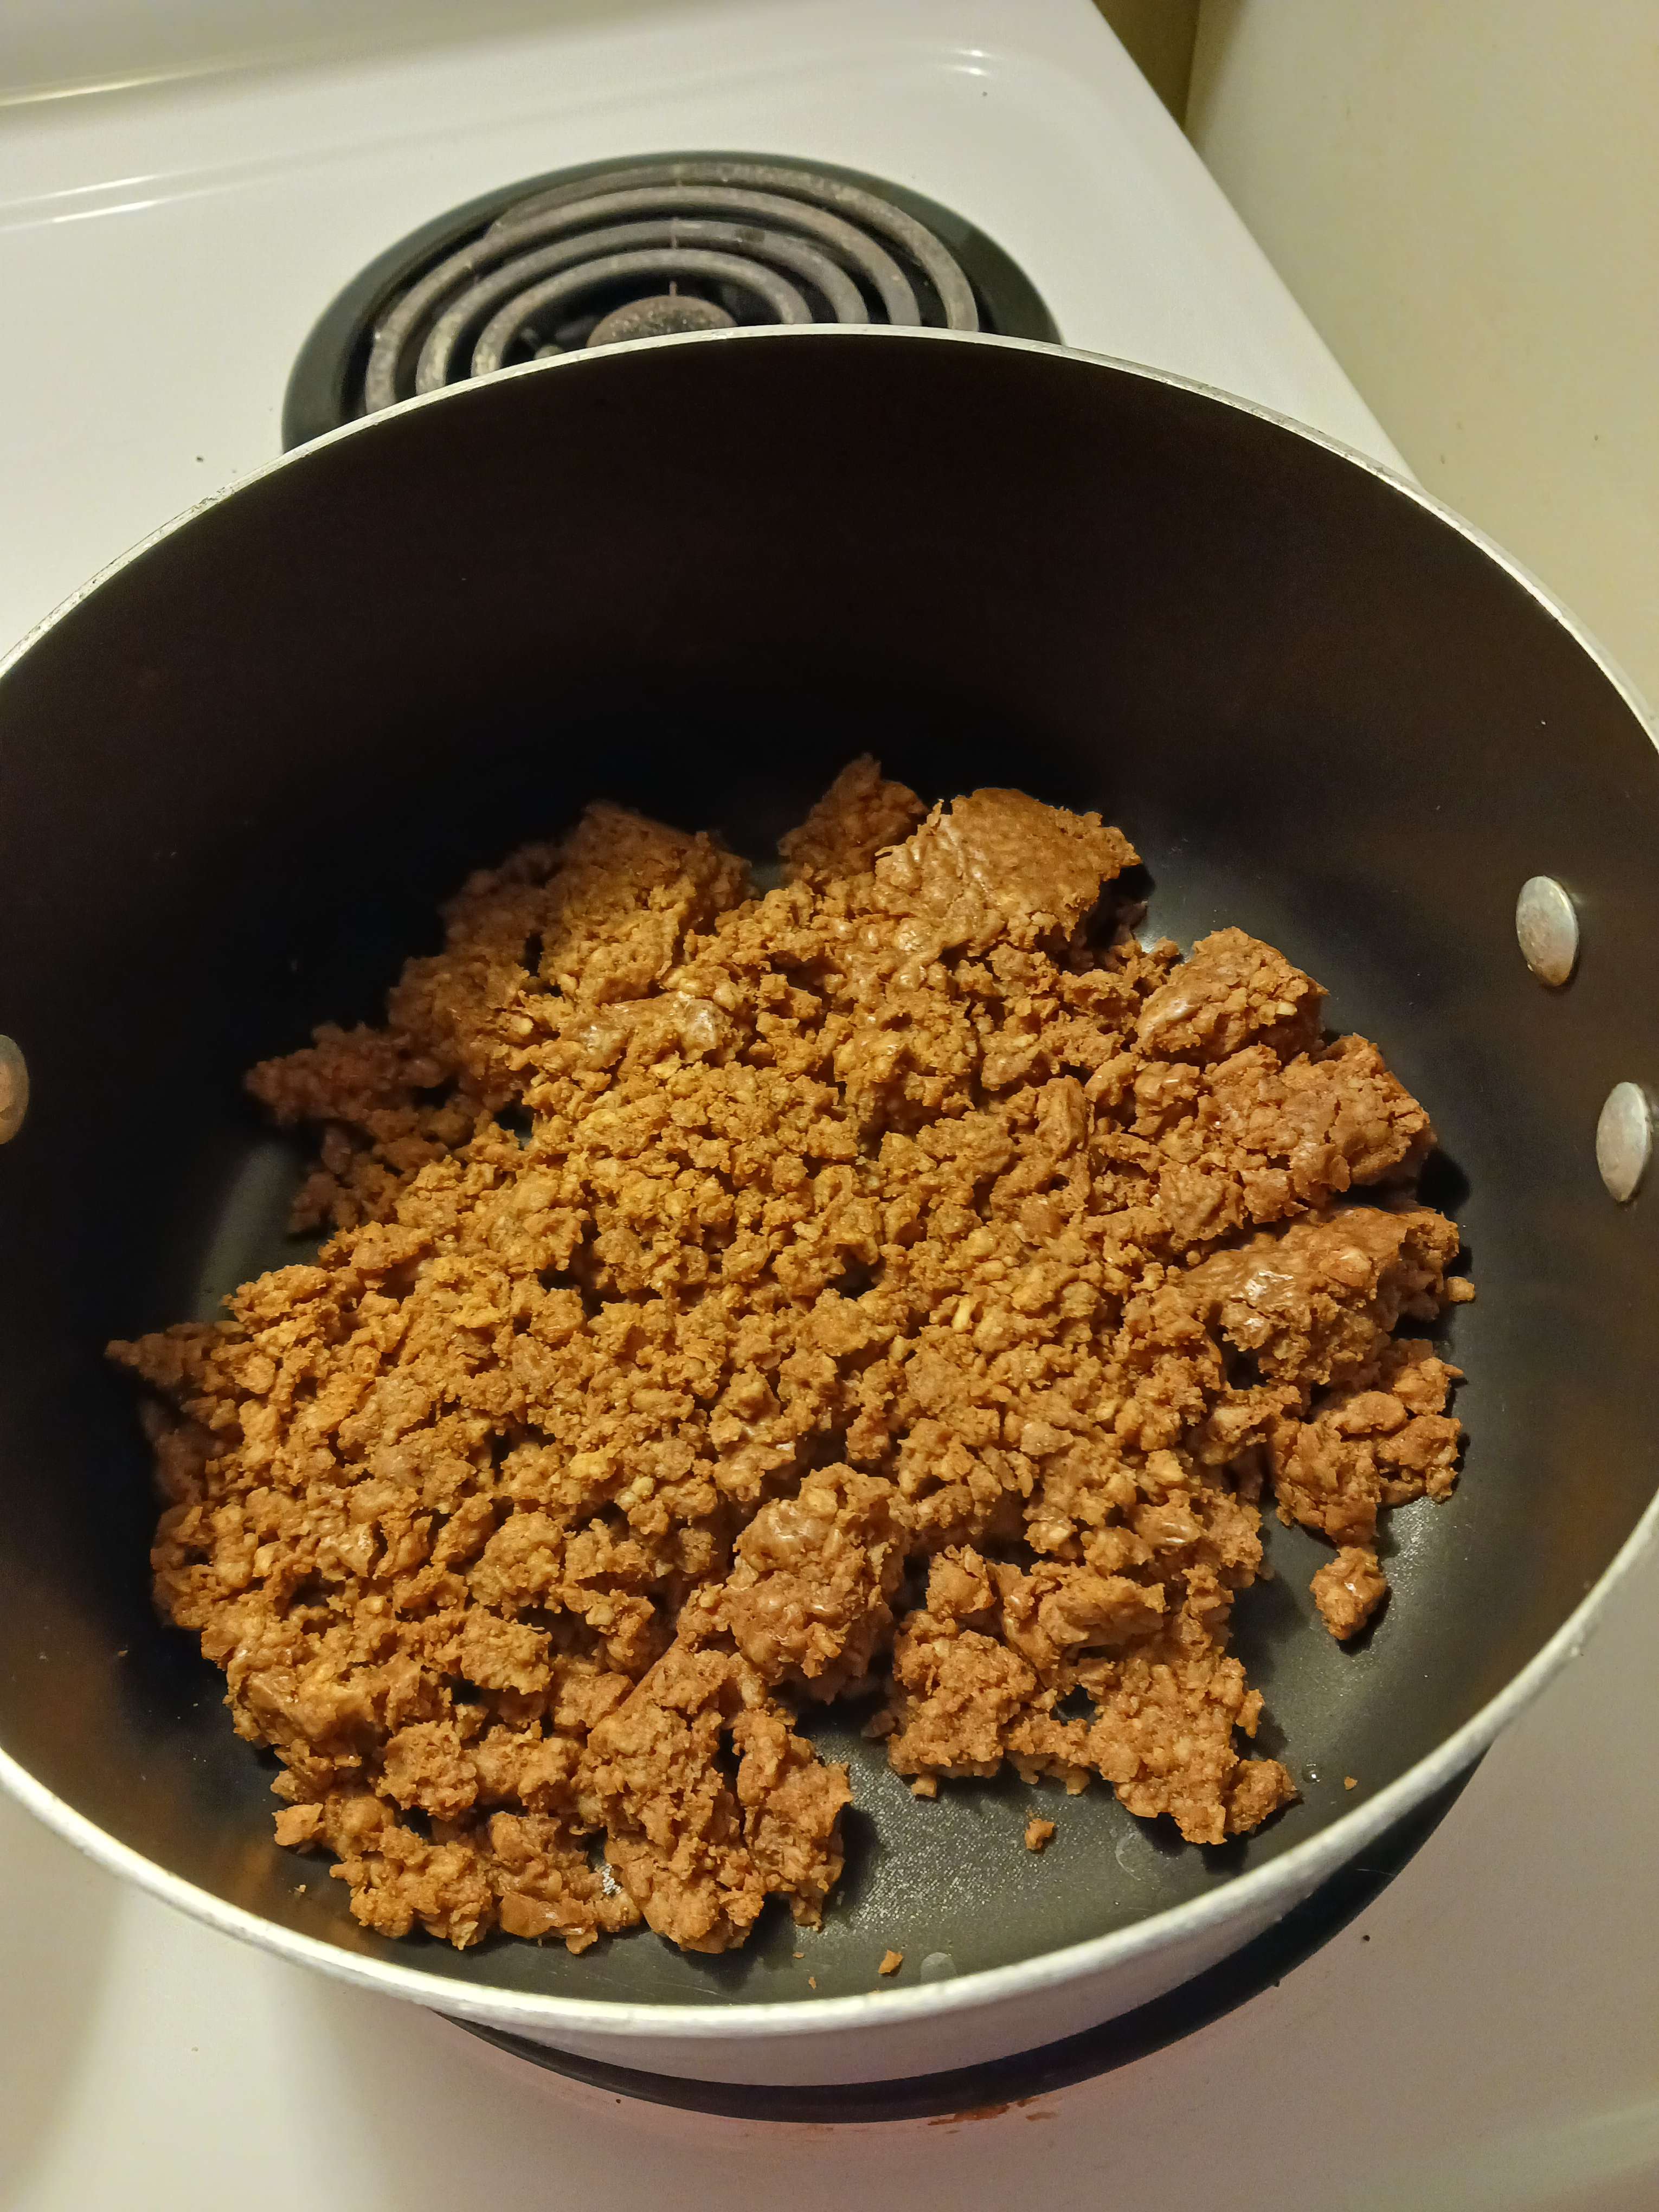
We aren't timing anything for the chili, but ideally we want to get everything in the pot before the rice finishes. We're going to start with our meat. Regardless of whether you're using real meat or one of these crumbles, unceremoniously plop it into the big pot, turn the heat up to 7, and start breaking it up. We're not adding any oil or draining any fat. The crumble is engineered in such a way that you can just leave it alone and it will naturally break apart on its own, but I like to use the ladel or a spatula or whatever to press down from the top and bust it up some to speed up the process. It's pre-cooked and would probably be fine if we moved on immediately, but I still like to give it a few minutes of browning time on its own. With real meat, you want to break it up as much as you can with a spatula or a fork right as you add it. You don't want to mess around with uncooked meet, so watch it until the bottom of everything starts to brown up nicely, flip it all as well as you can, and move on to opening cans while the other side cooks. Again with the crumble, just get it broken up somewhat and you can move on. It's the easier option, the healthier option, and I think it gives the chili a better overall texture in the end.
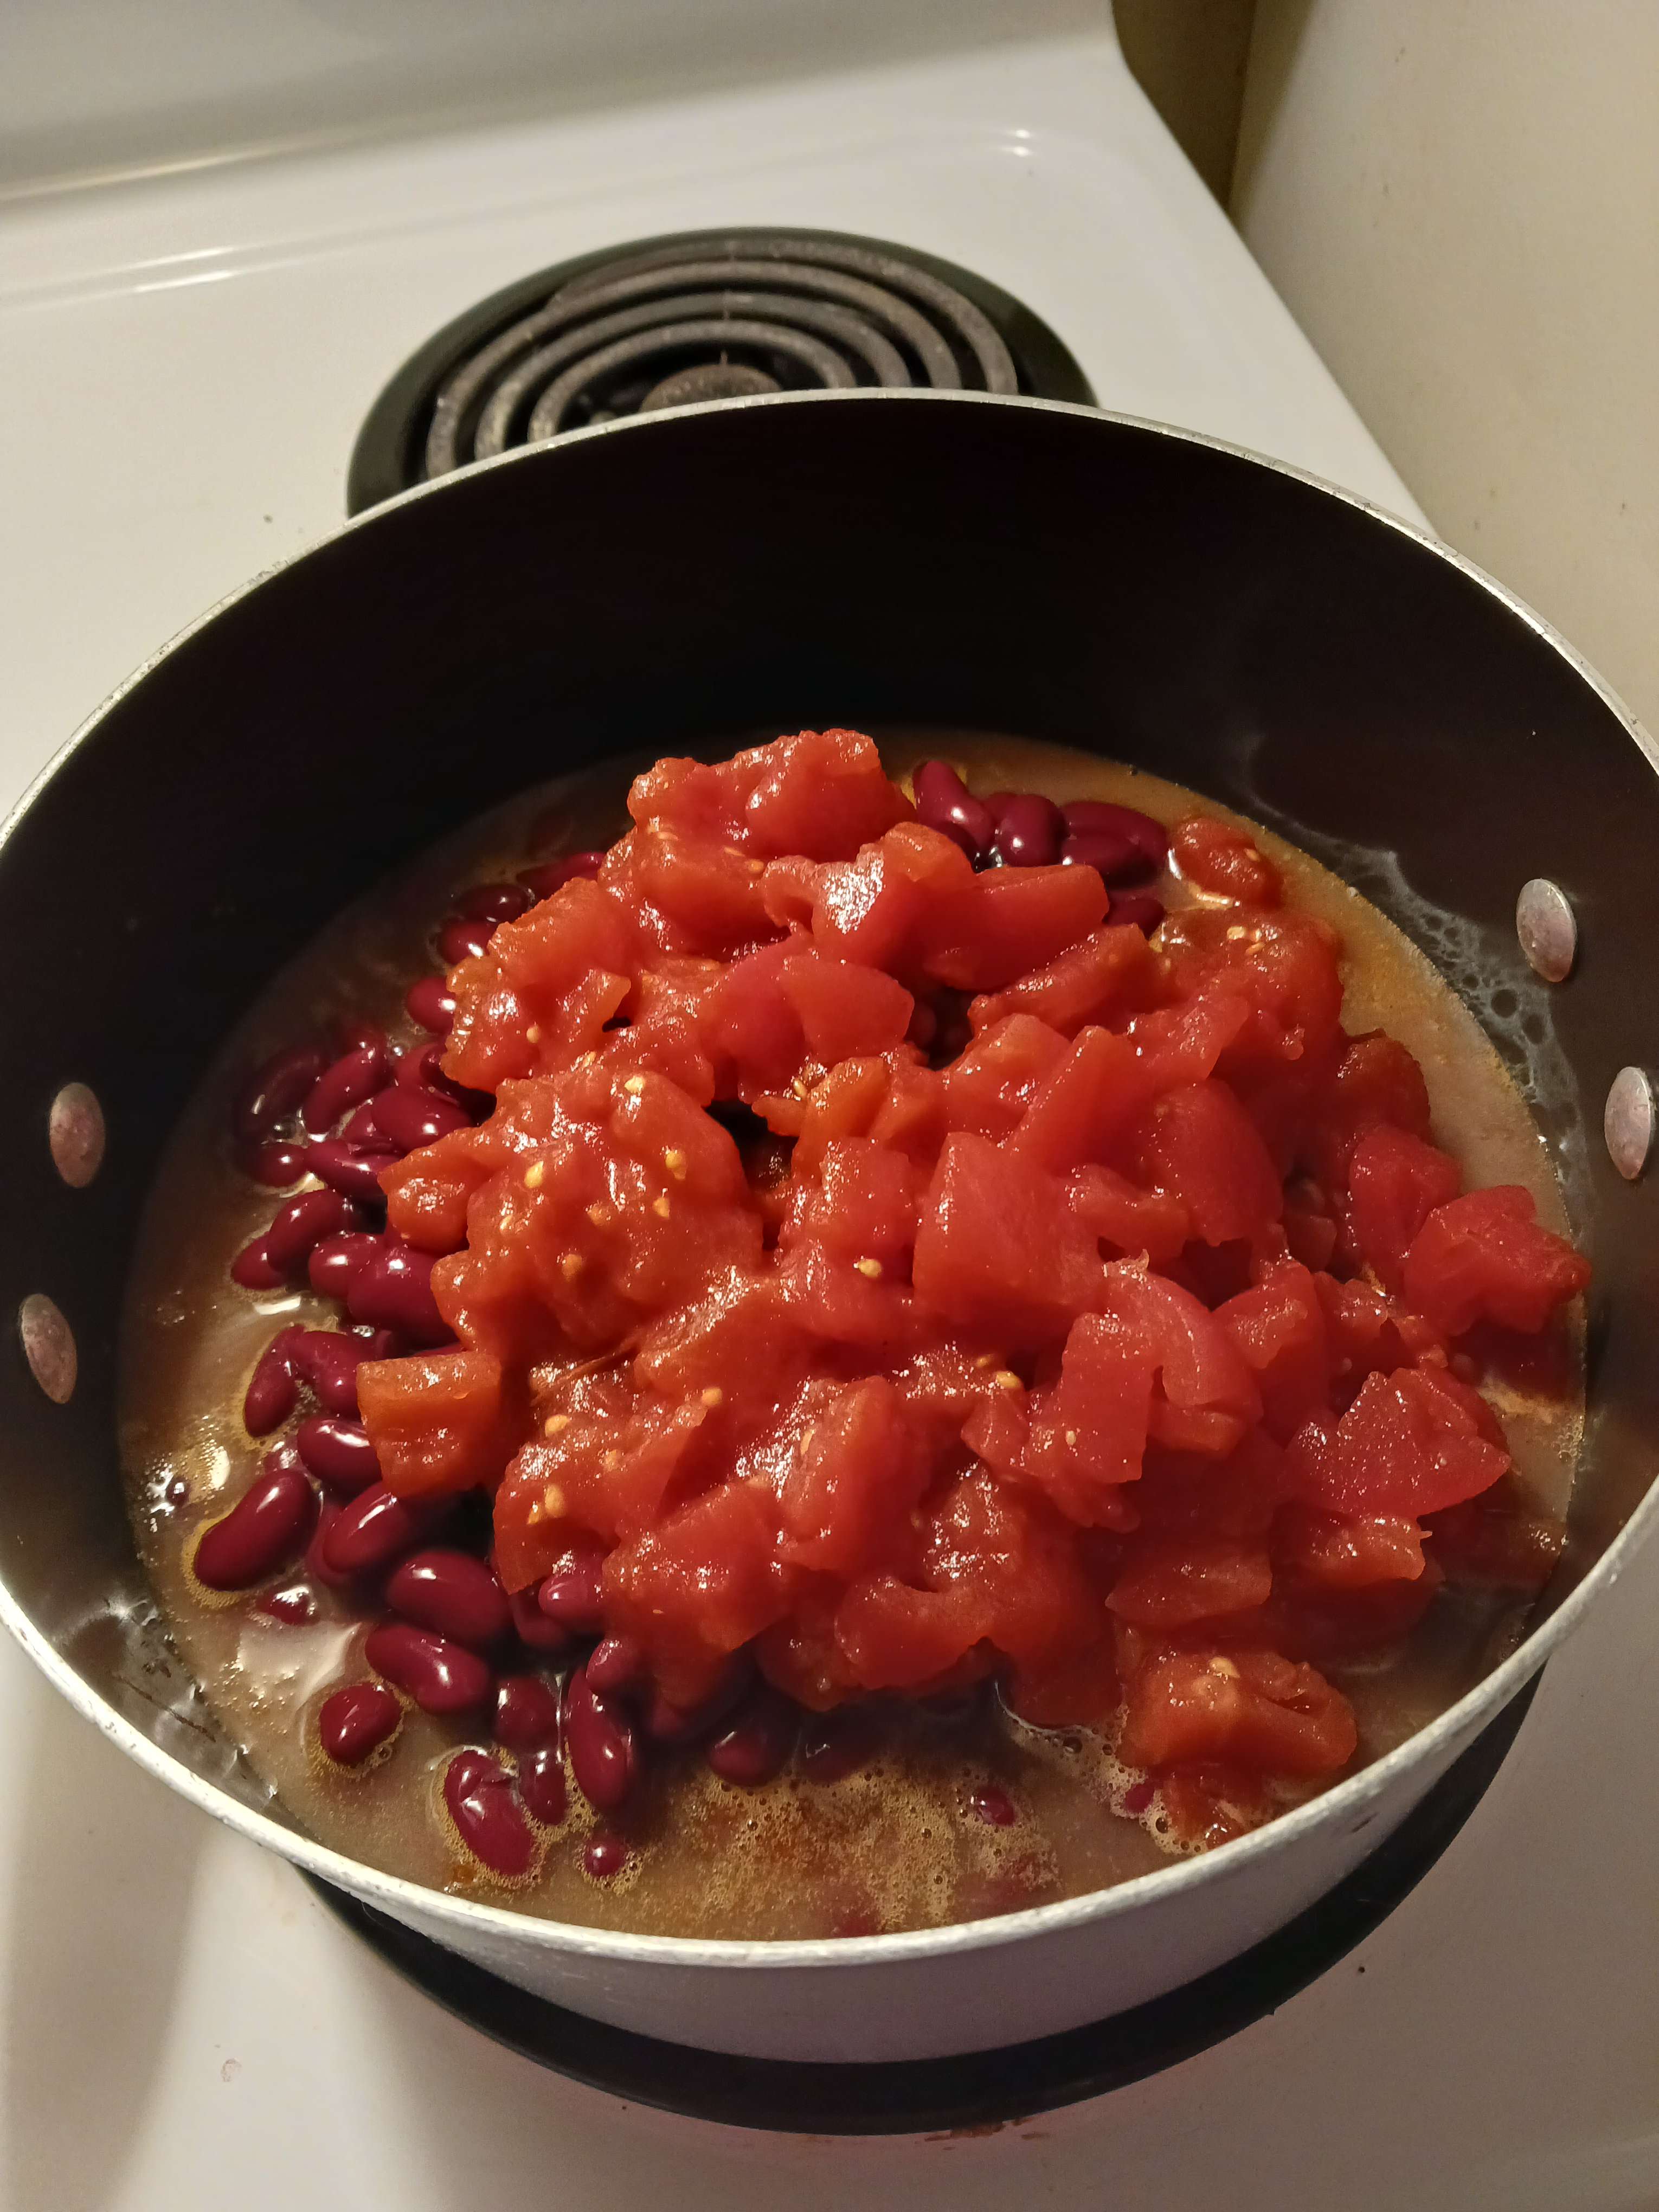
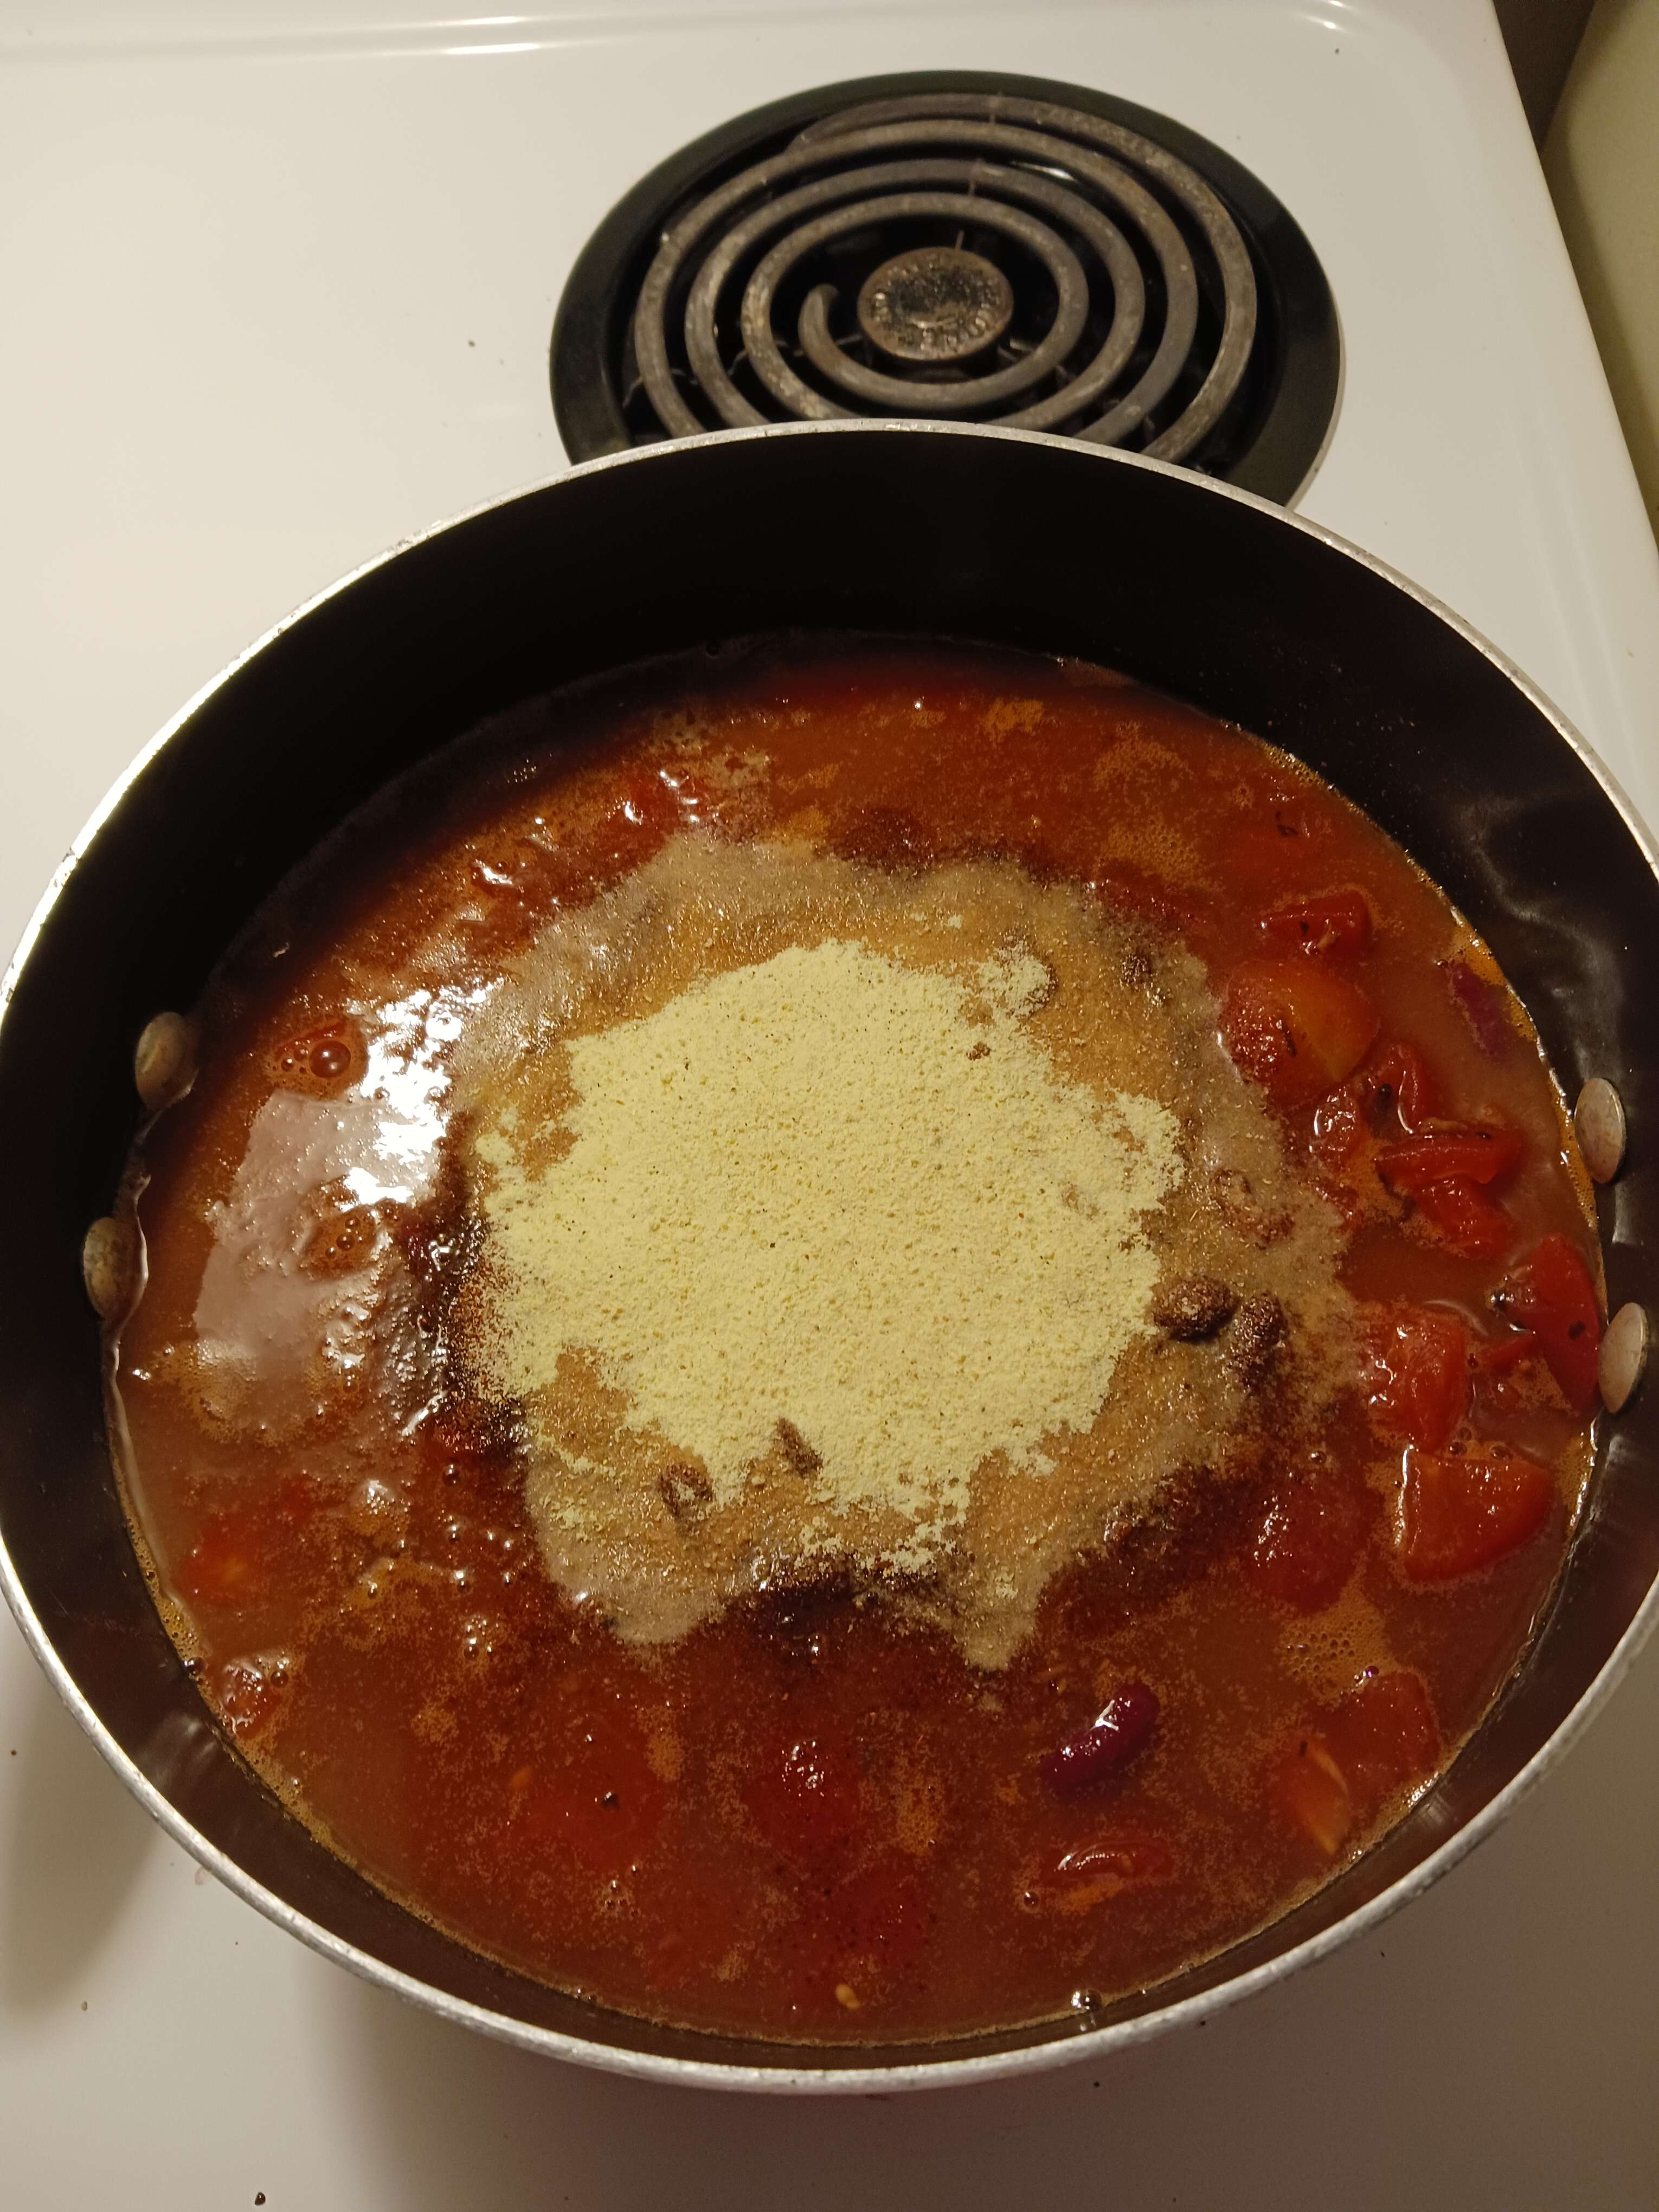
While that's finishing up, take the can opener if you need it, and get the lids off all the cans. Be careful with sharp edges, try to get lids off clean, wash them and toss them. Once everything's open, the meat should have had enough time alone, so dump in all the beans, take a quick moment to rinse the cans for recycling. Then dump in the tomatoes, rinse that too. For our final wet ingredient, pour that V8 right in the middle. It should spread out the mountain of beans and tomatoes to a more even surface, and as a side note, this can of diced tomatoes+cup of V8 combo is my semi-secret family recipe for cutting to the chase in any recipe that wants you to spend forever stewing tomatoes down. Try it for goulash!
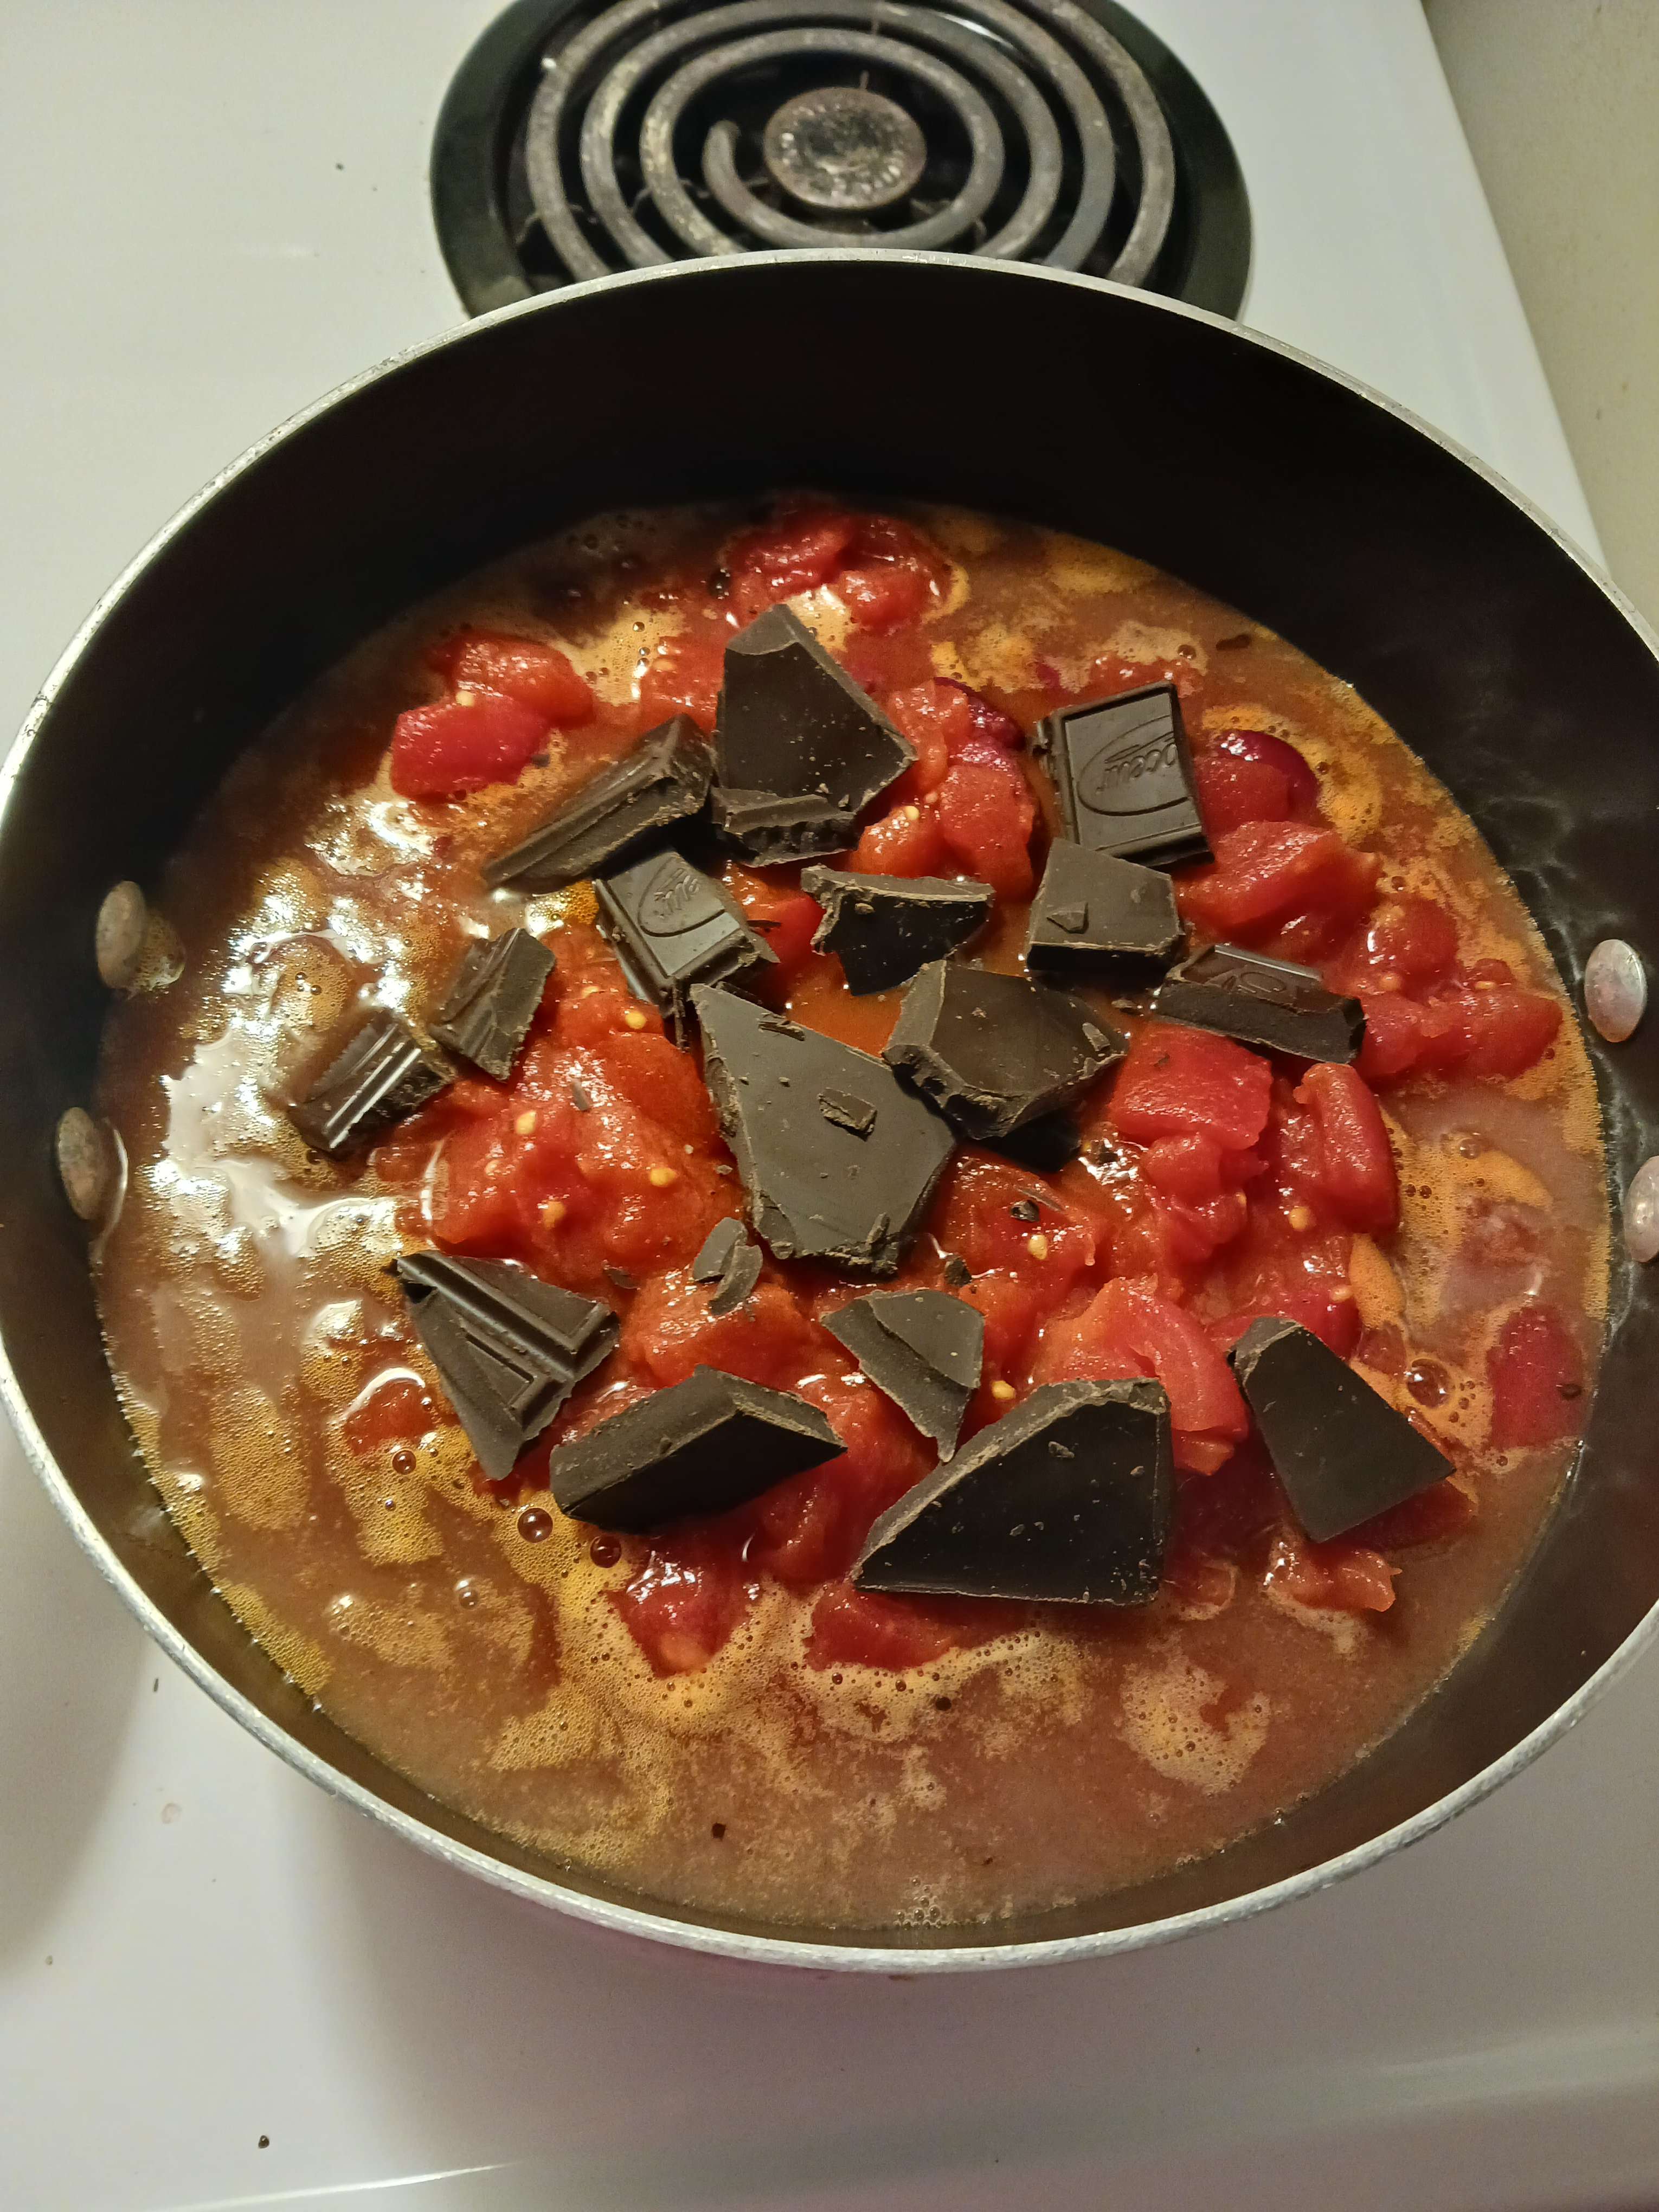
Things should be very liquidy now between the V8, the water packing the beans and tomatoes, and if you're using real meat, whatever fat drained out. This is intentional. Before the rest of the dry ingredients though, you should unwrap and toss in the boullion cube, and break up the chocolate and throw that in too. It might work better to substitute cocoa powder for the solid chocolate, but if you take a moment now and stir it in, it'll melt nicely and just join the flavor mix.
|
   |
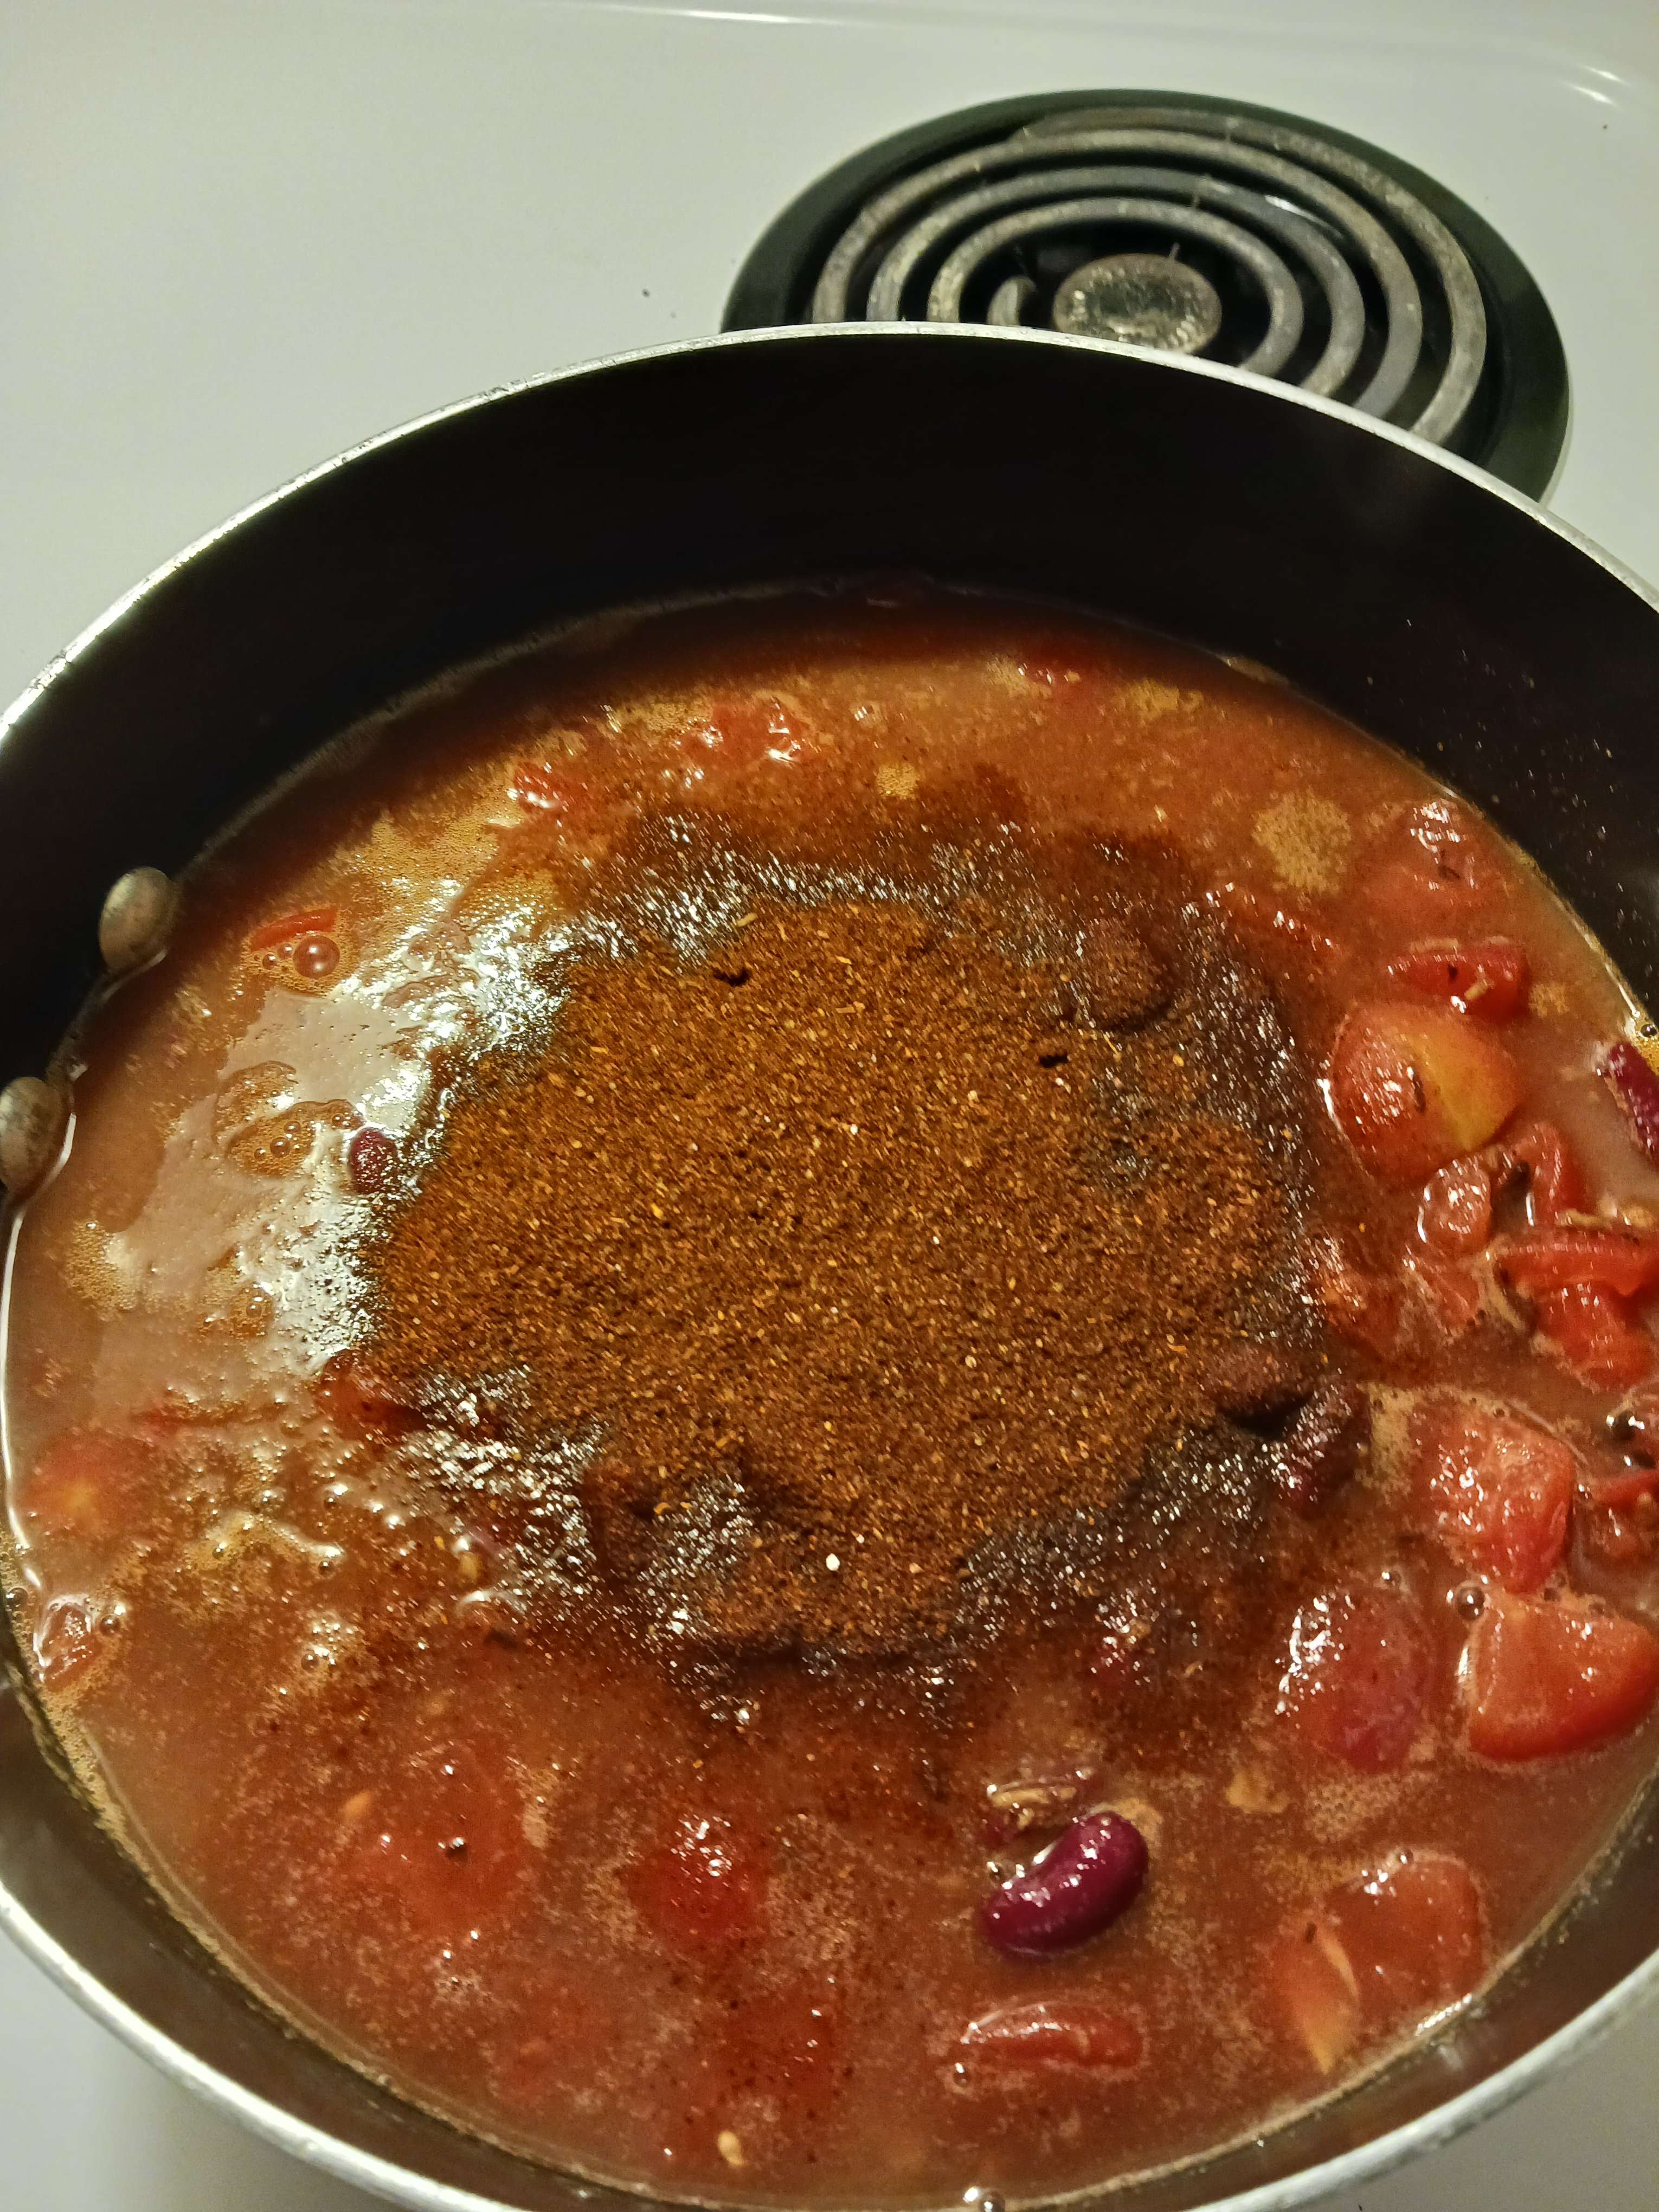
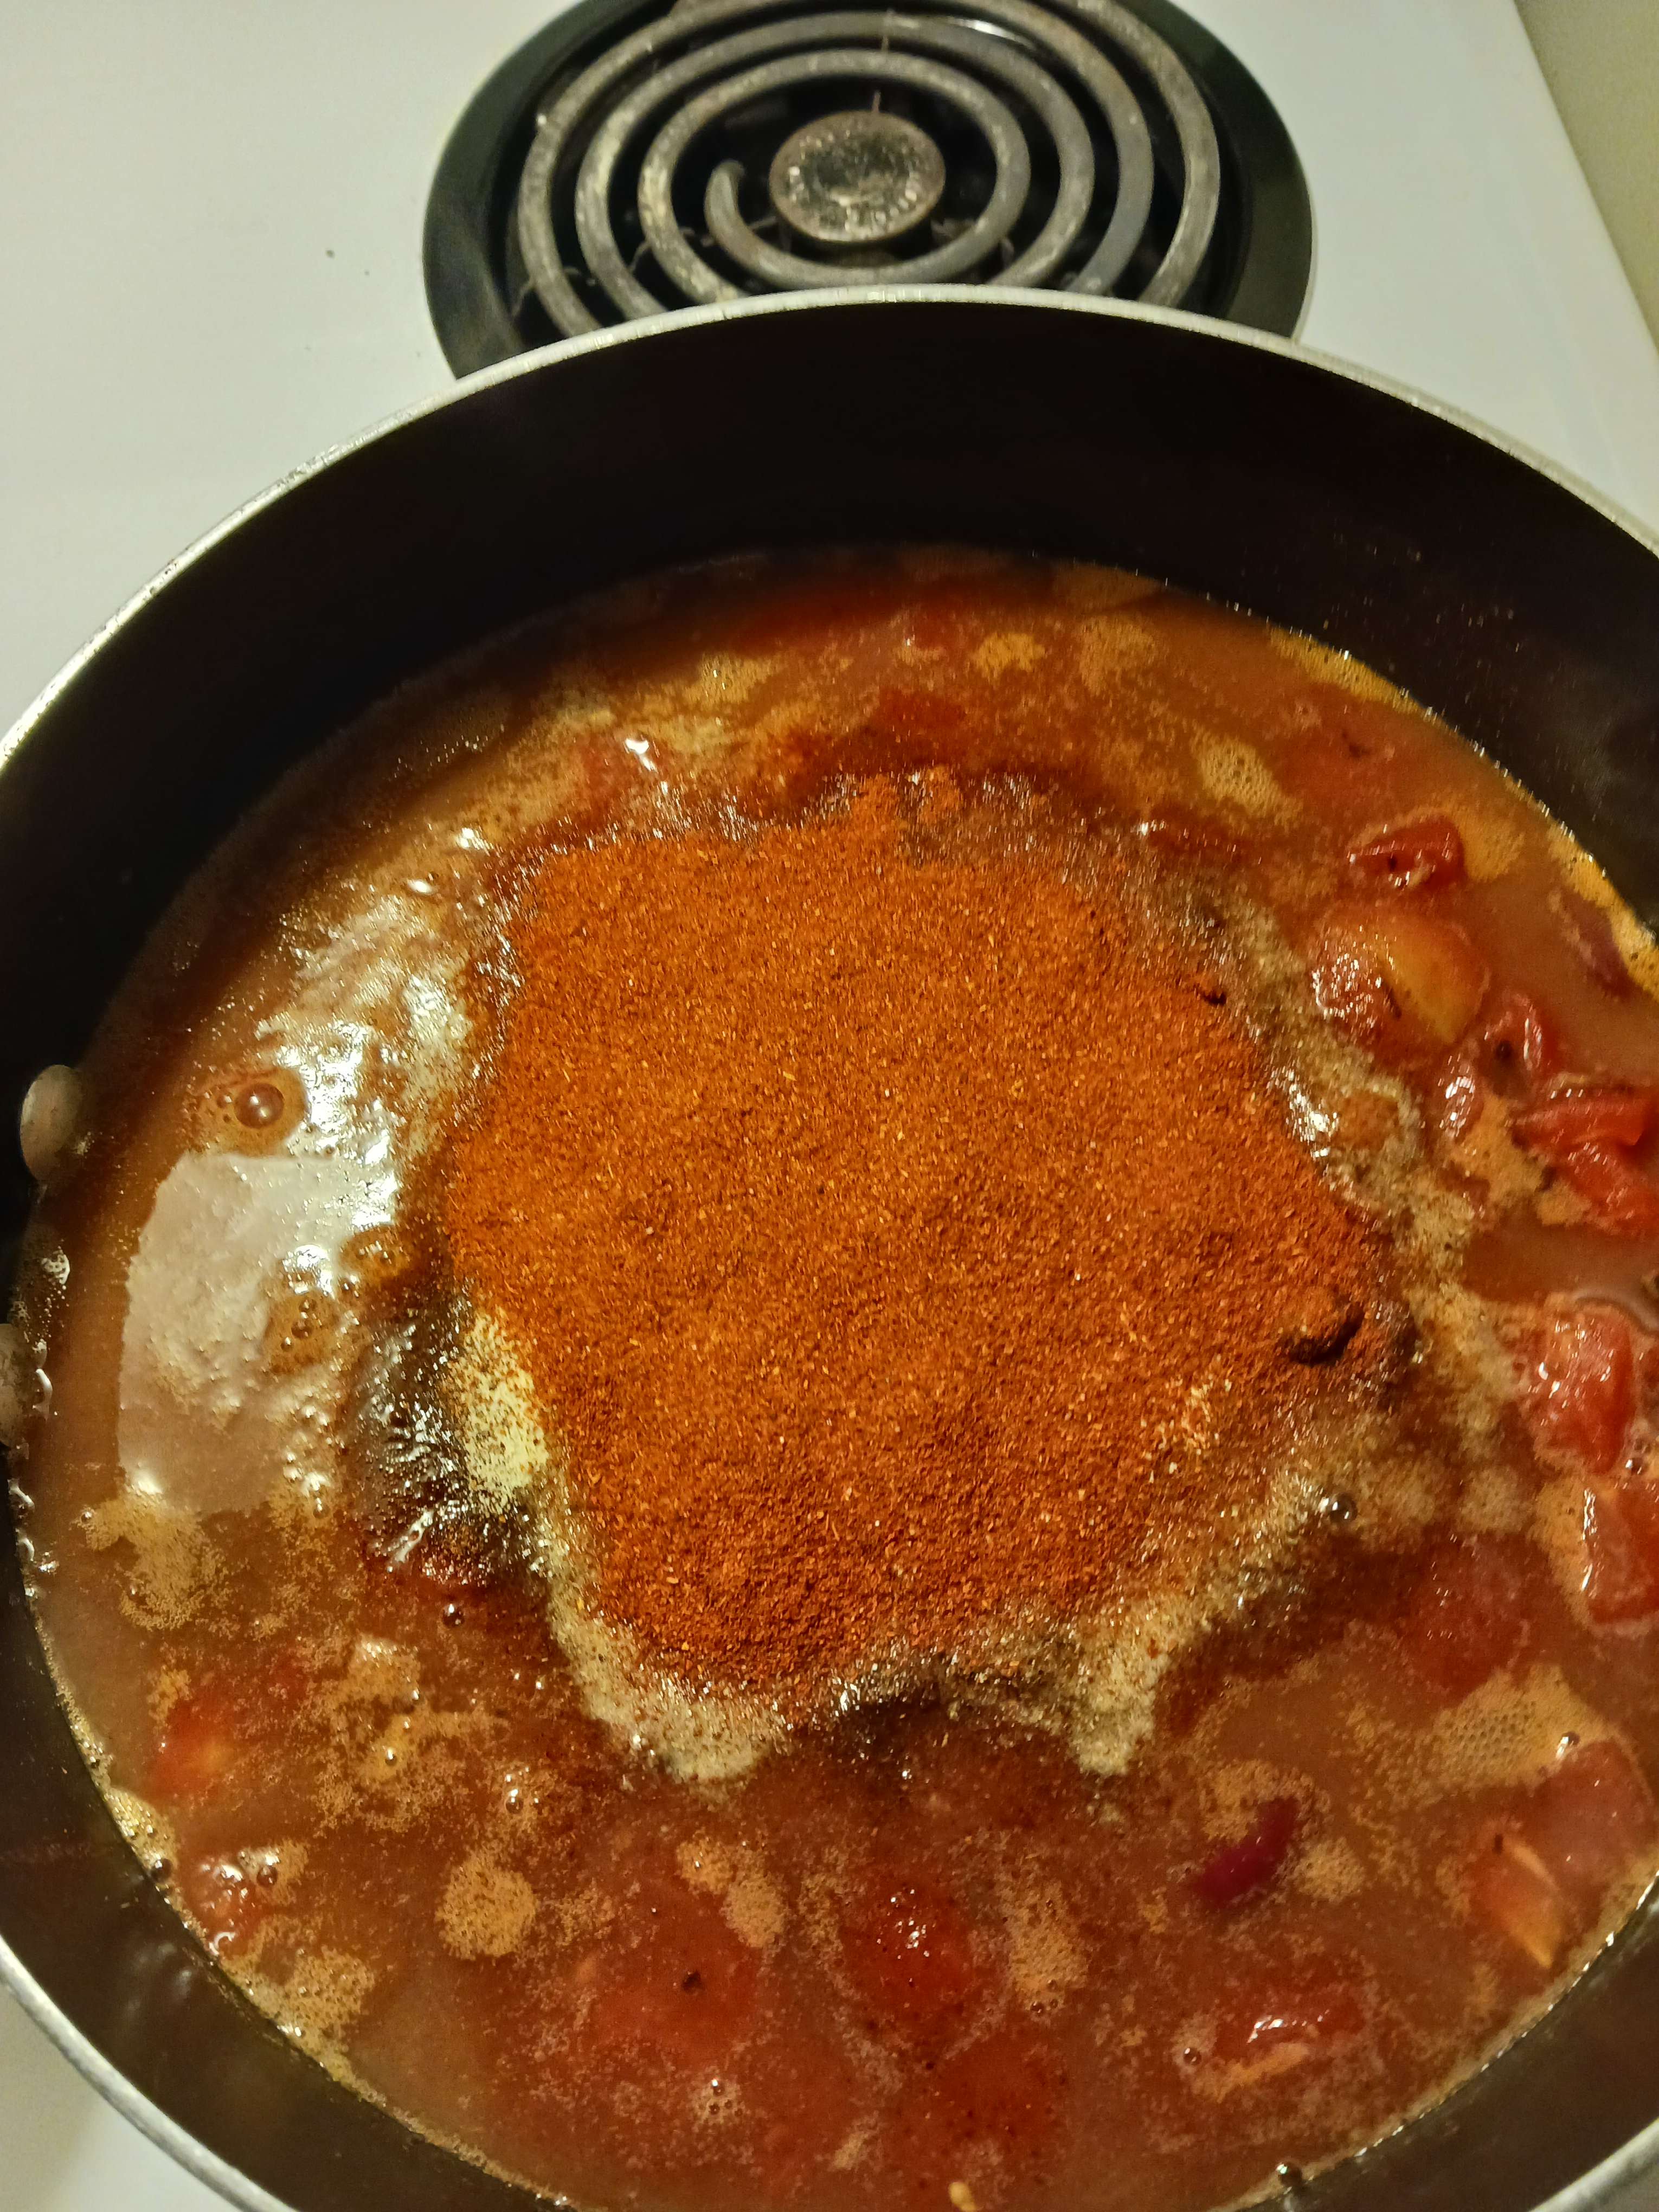
| Now it's time for the dry ingredients. I never use a measuring cup for this. It's more about ratios than exact quantities. For the chili powder, adobo, and paprika, you just want to go SUPER liberal with the shaker for the first, get a floating coating of about half the diameter of the whole pot. That's my rough guide. And if you do the adobo in the middle, you can easily keep it 1 to 1 to 1 just layering the three. If you aren't familiar with adobo, it's a blend of spices which are... mostly things I'm already adding here. If you can't find any, just add some turmeric and salt, maybe a little more of some other spices. If you can though, enjoy having a new go-to if anything's bland and needs a little kick. It goes great on basically everything.
|
   |
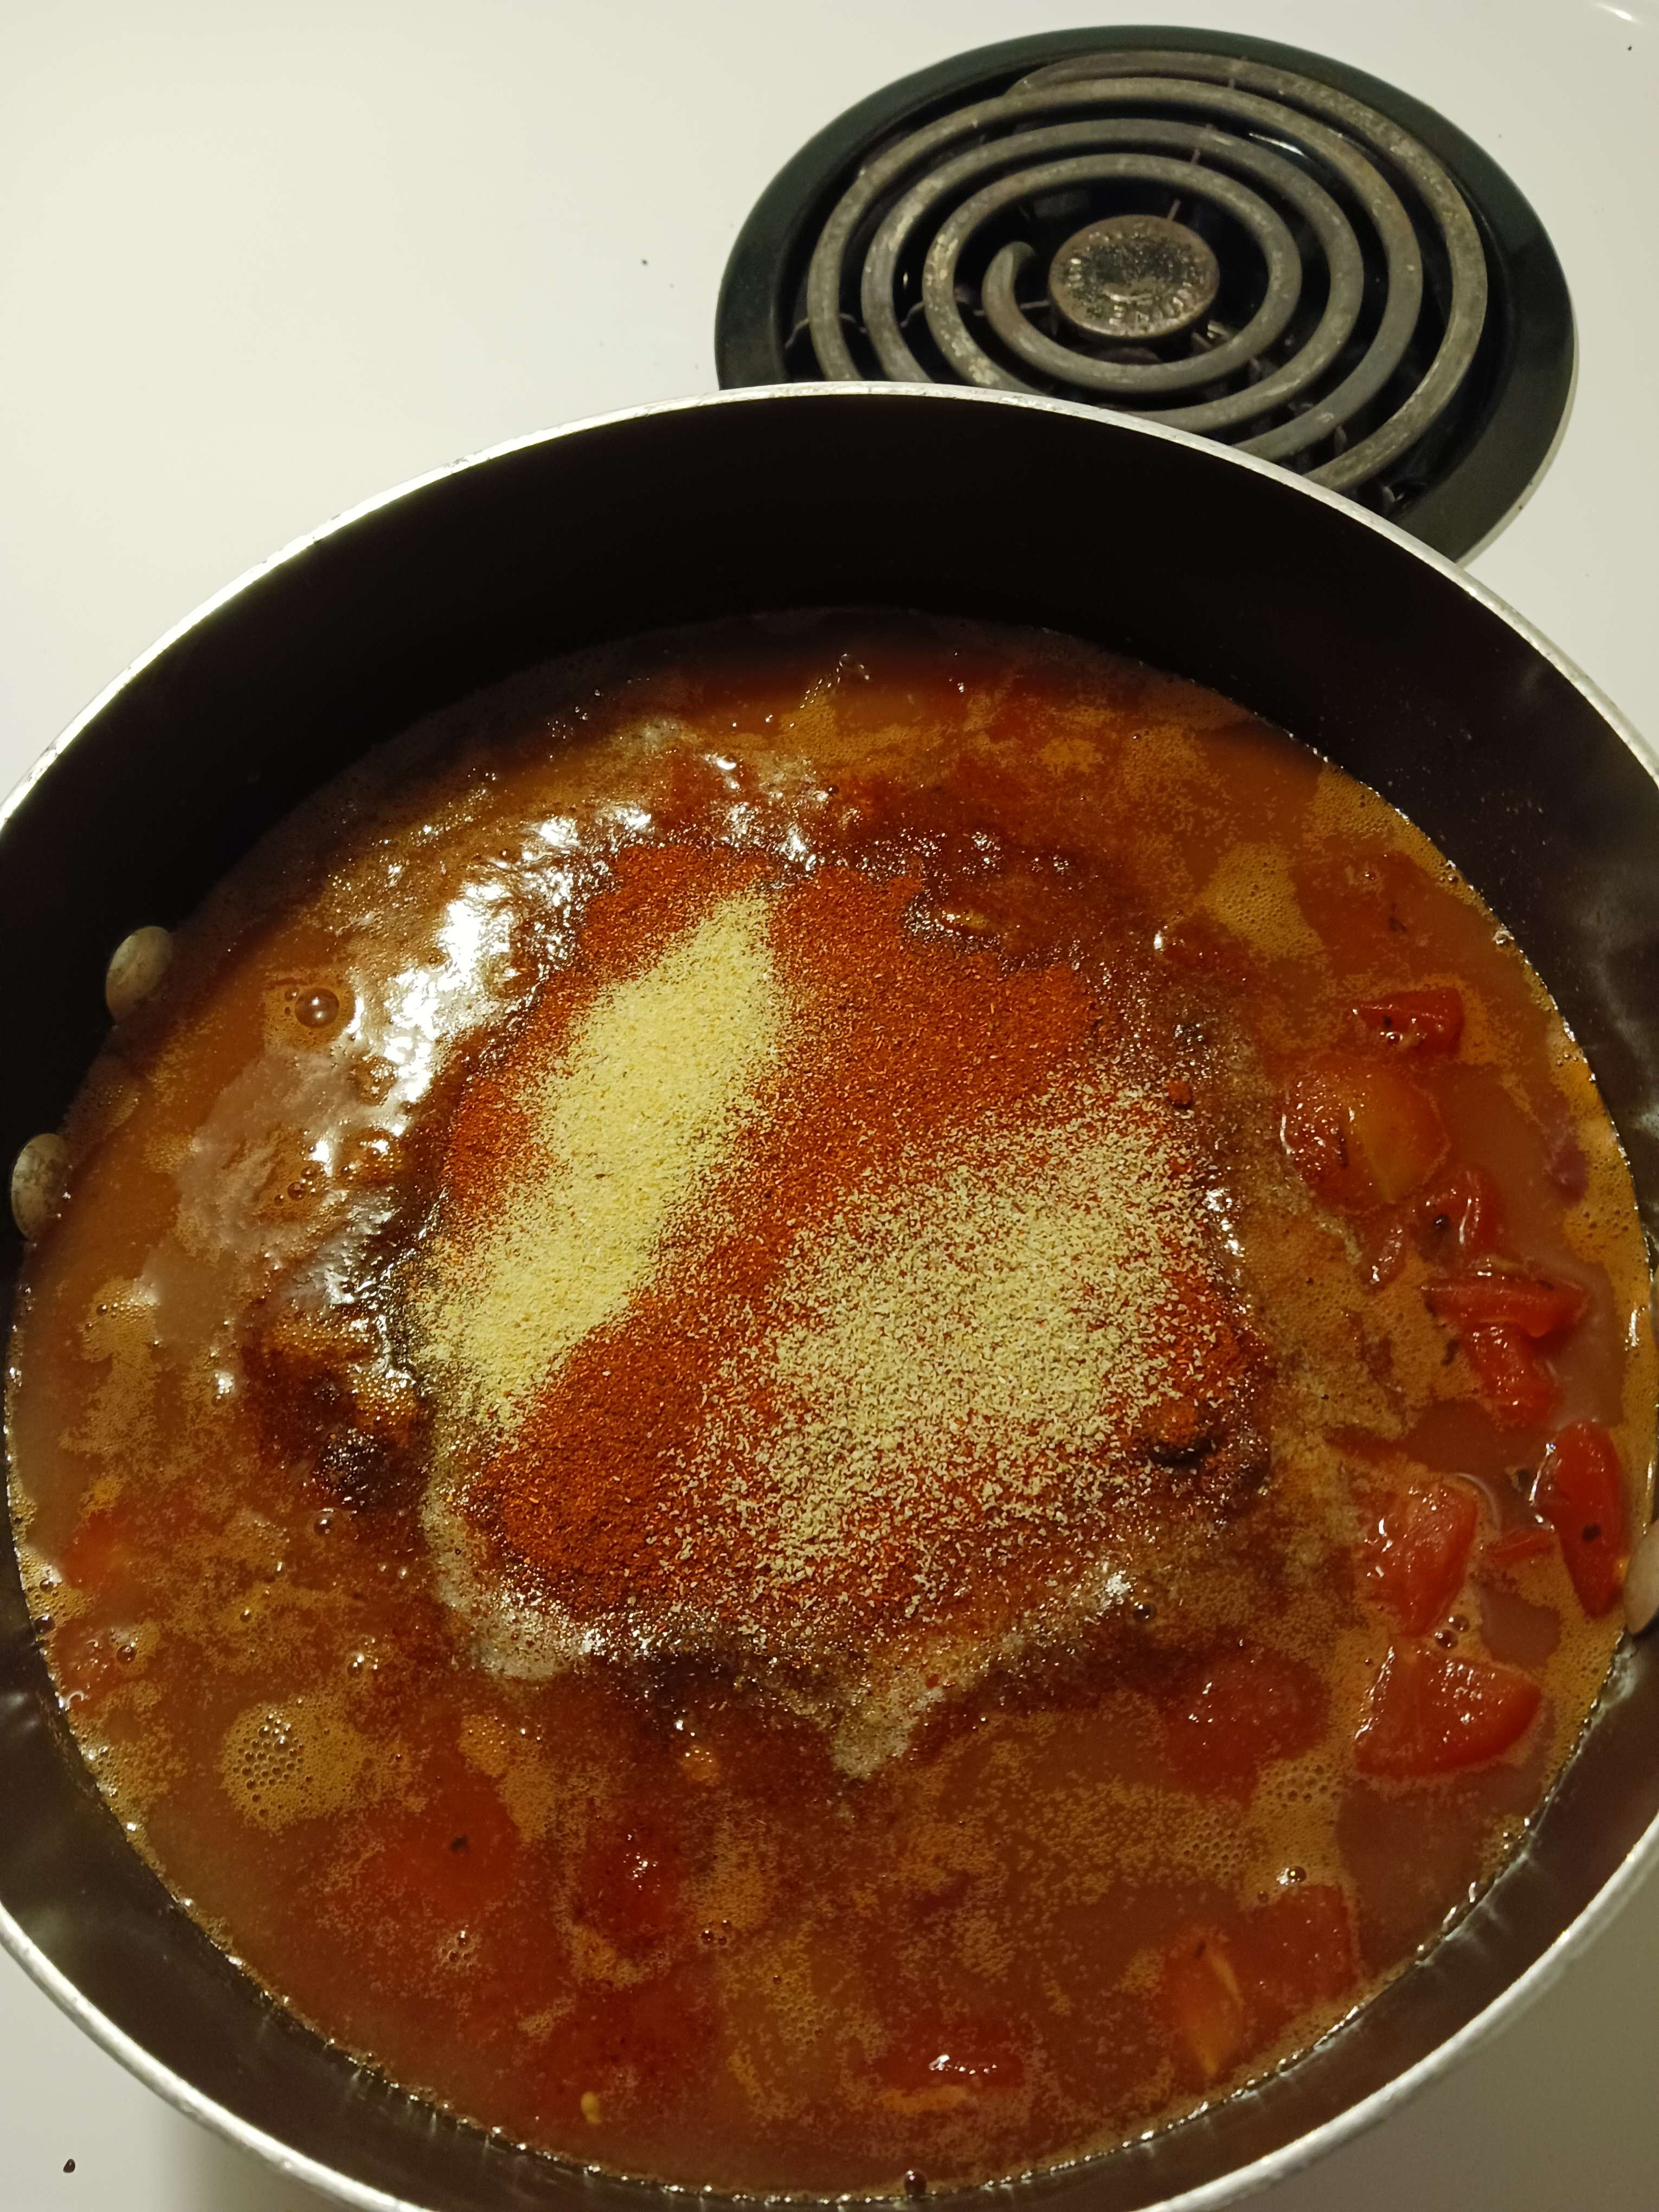
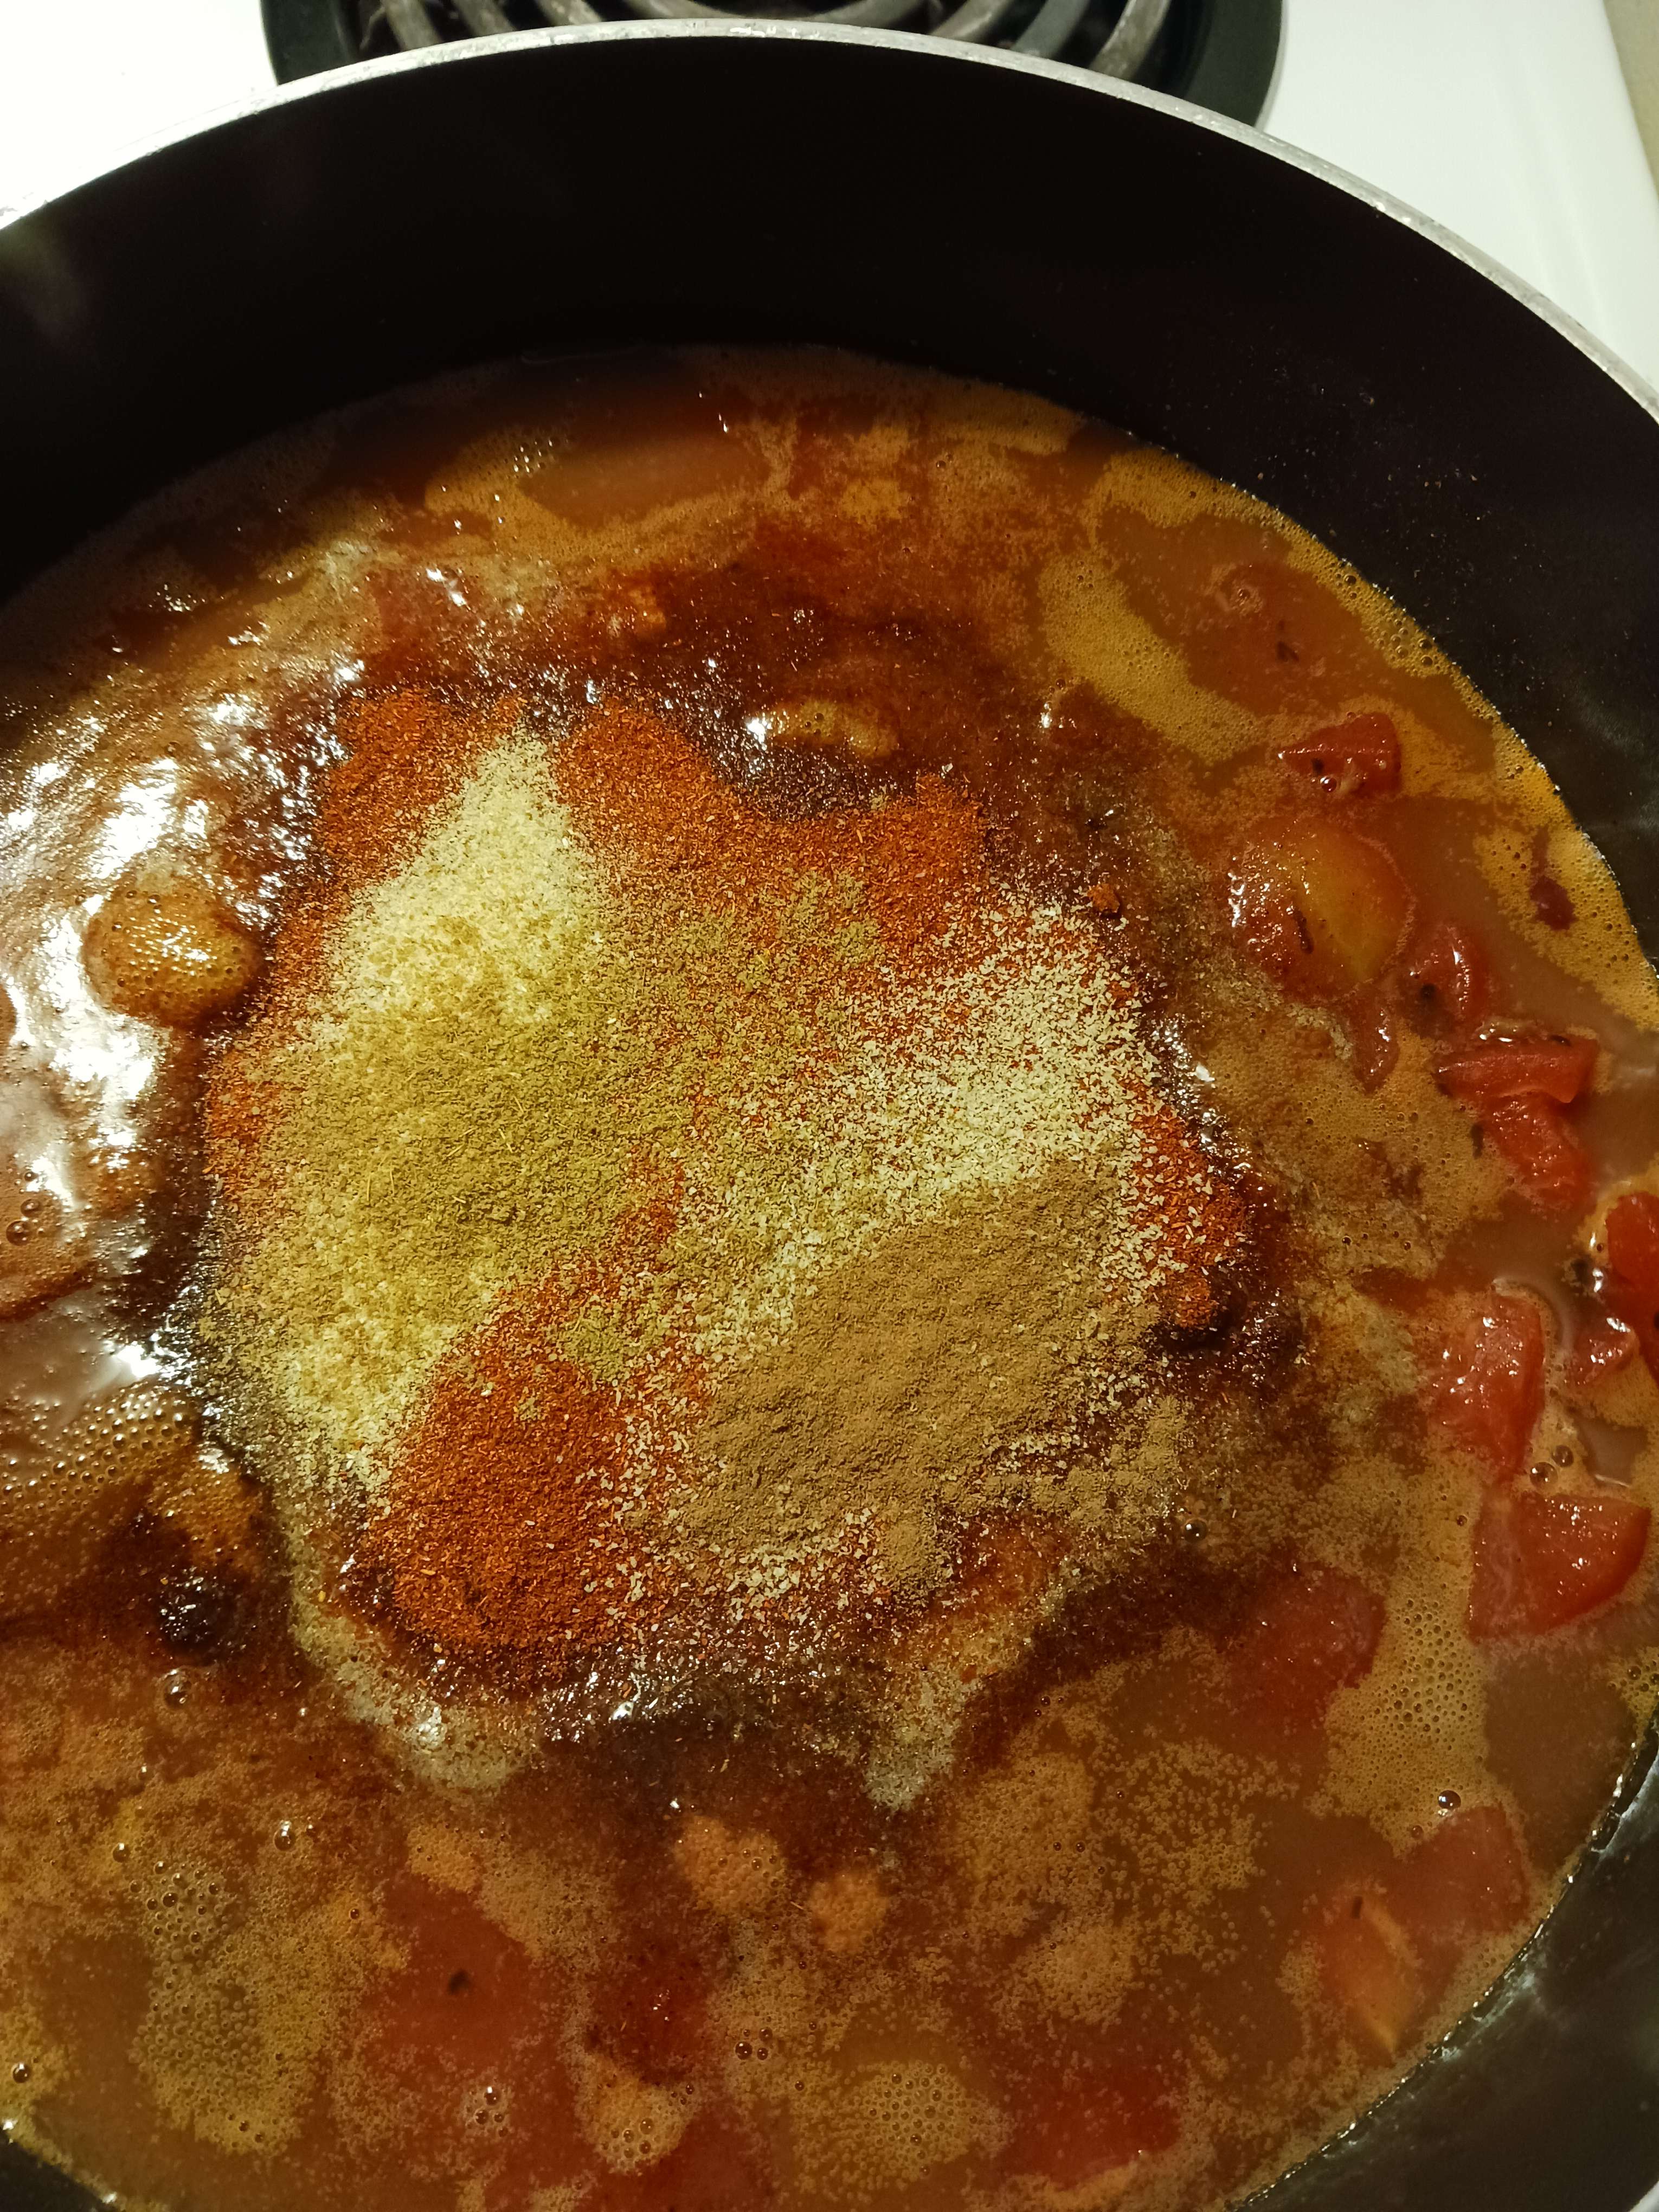
Last few ingredients now. I go a bit more sparingly with the garlic powder and onion powder. Maybe about a third as much as the primary spices. A little cinnamon goes a LONG way so you really want to be careful adding that. Maybe 3 quick shakes for the whole pot usually does it. I don't always throw in cumin, but when I do it's also just a few shakes. I didn't show them in the photos since it was a last minute whim, but for this particular batch I also added a few shakes of oregano, and a bit of MSG at the end. Basically I always do a little freestyling at the end. Just go heavy on the beans, stick to this rough 3:3:3:1:1 ratio on the main dry ingredients, and experiment around a little from there.
I add 3 good second-long squeezes of my lime and 2 quick squeezes of hot sauce at the end, usually, mixing it up based on my mood.
|
  |
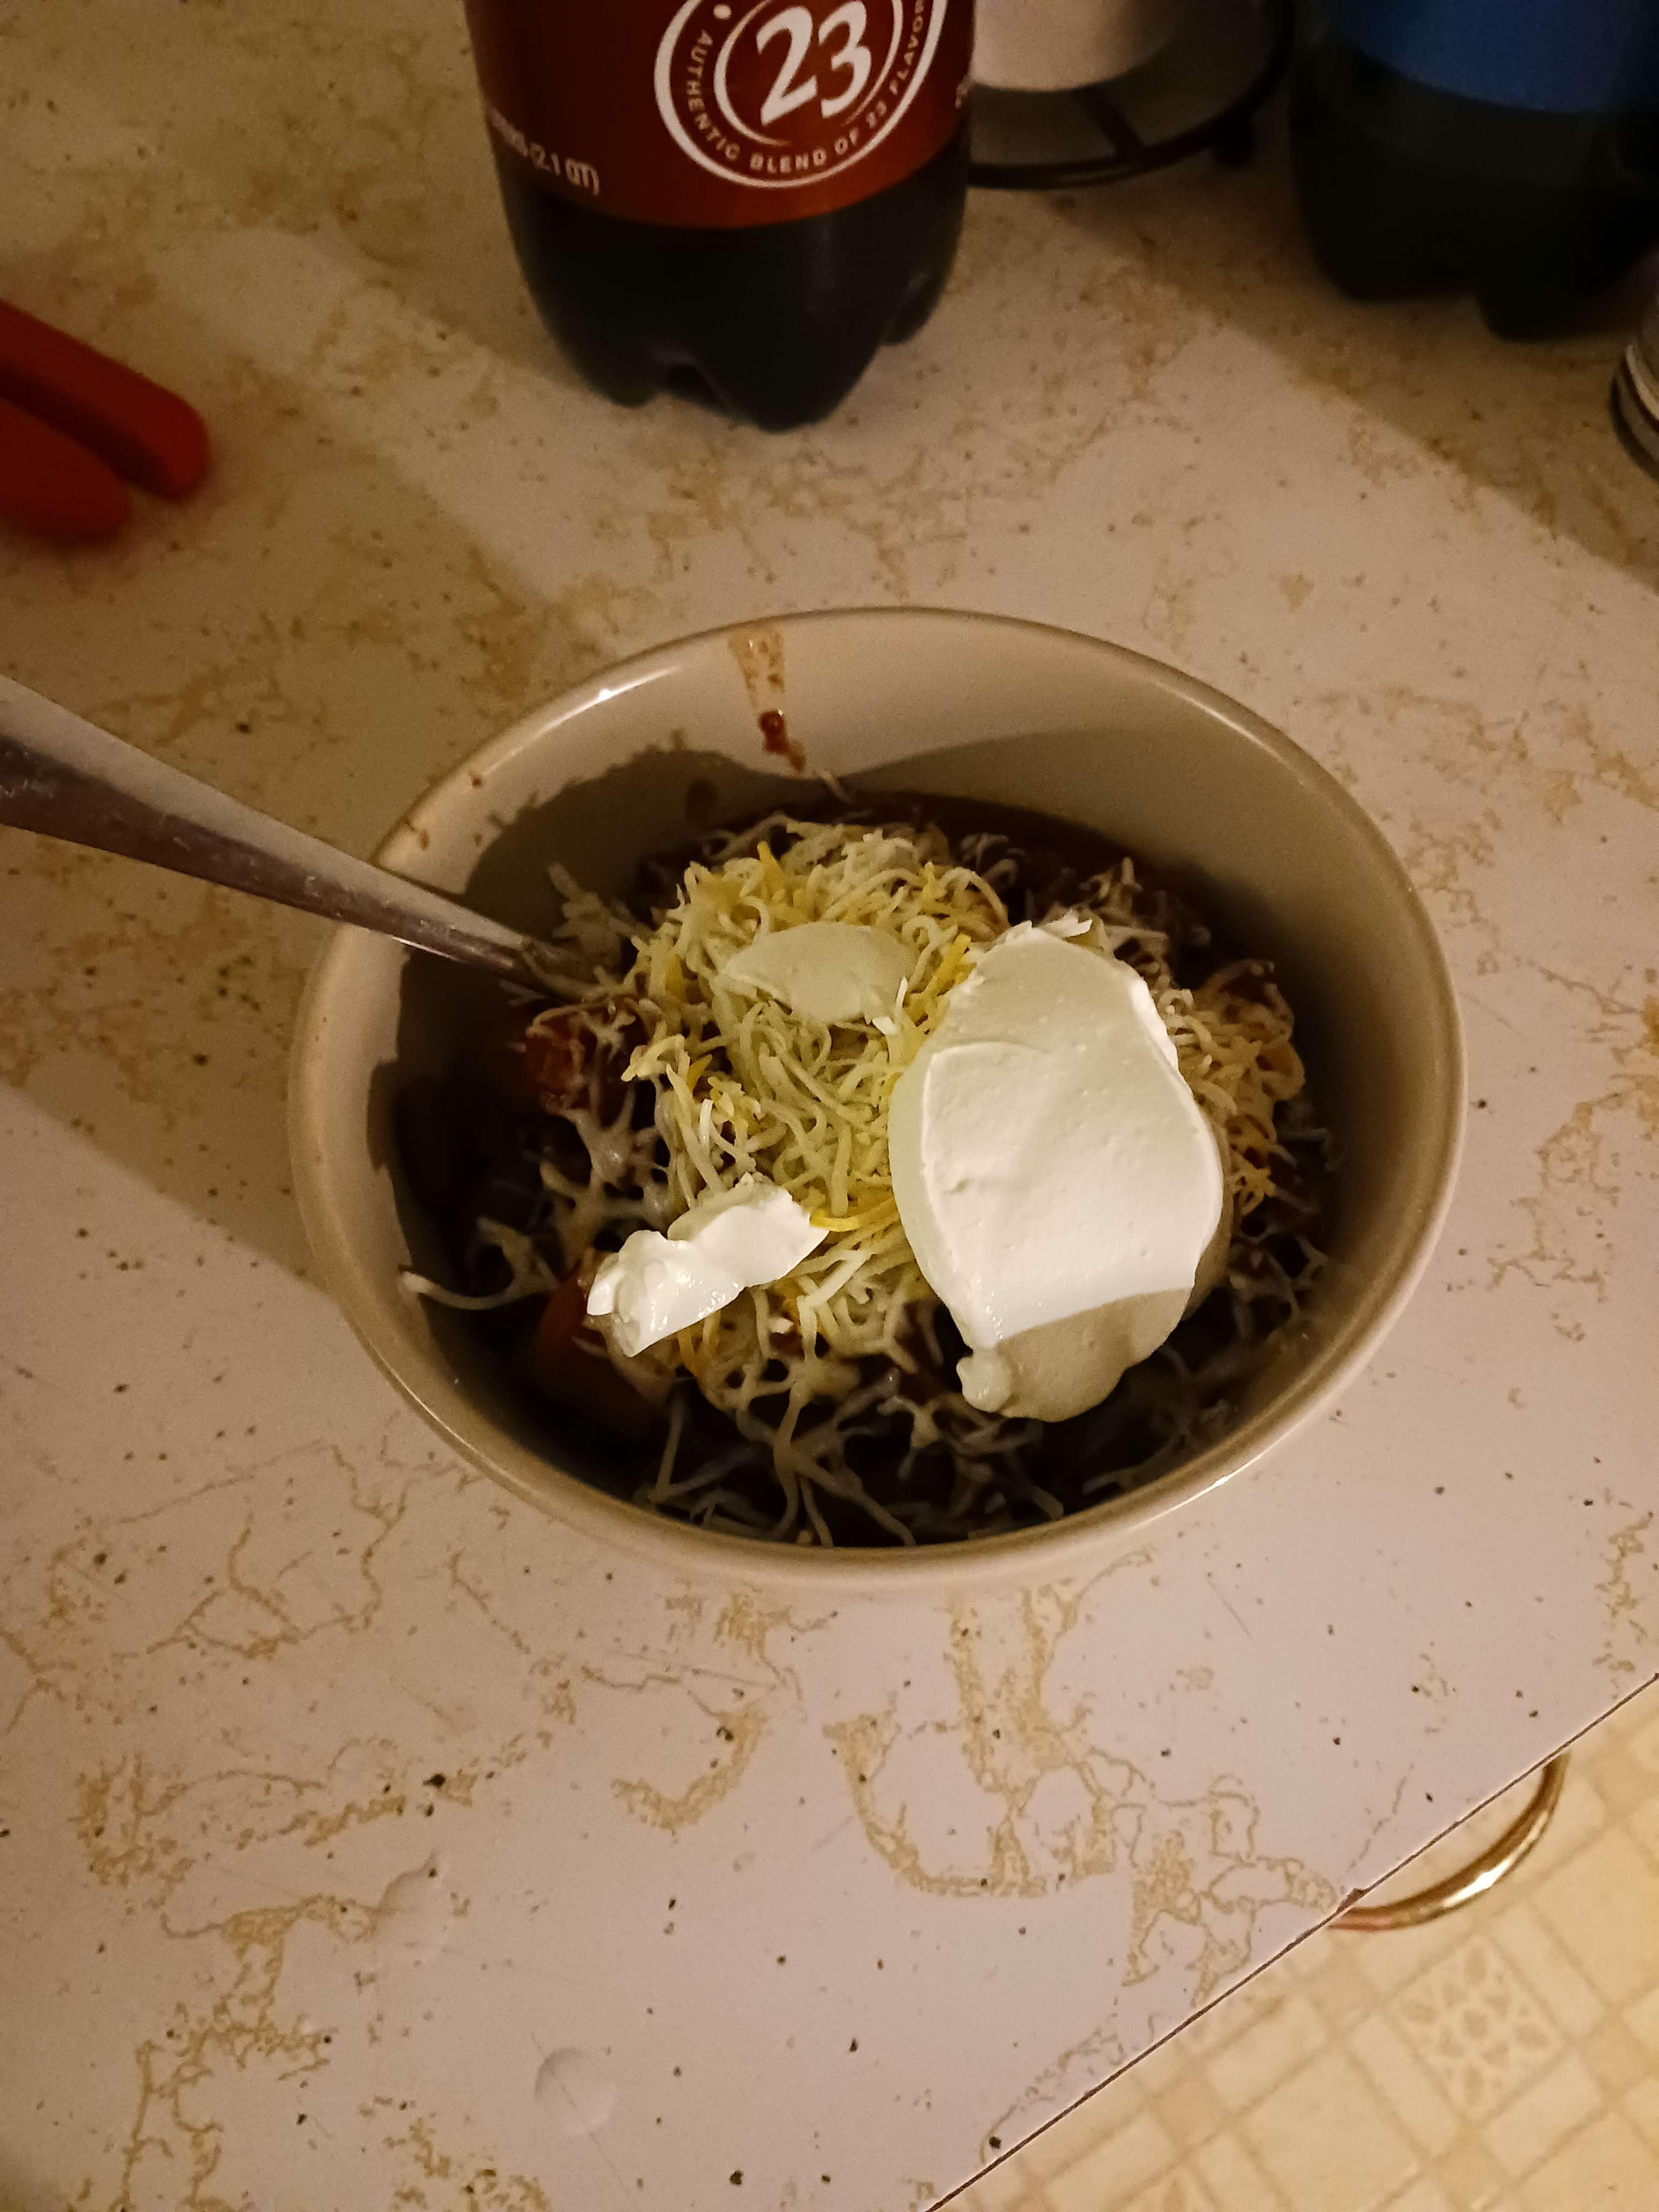
| And that's it, really! Give things another good stir once the dry ingredients are in there. You should let it keep cooking at 7 for the next 10 minutes or so, then drop it to 2 to simmer for another 10 if you can stand it. Somewhere in there the rice should finish, just cut the heat, take off the lid, and let it cool a little while the chili simmers a bit. Fill a bowl maybe a third of the way with rice, ladle in some chili, top it with a little shredded cheese, maybe a spoonful of sour cream, and enjoy! Like most chili it's even better the next day after it's cooked down some and spent some time chilling in the fridge. Oh and I do just have the Dr. Pepper in here for scale, it pairs very well here I think. It's also worth noting that this does feel like a big deal the first time you make it, but once you have it down, it's just meat, cans, shake shake shake, squirt squirt, wait, and even small containers of these spices could end up lasting you a year if you don't make this more than a couple times a month.
|
 |